Bracket Bonding Setup
Written by the Equate Instruments Technical Team · Reviewed by the Medical & Dental Board, Equate Instruments · Updated ·
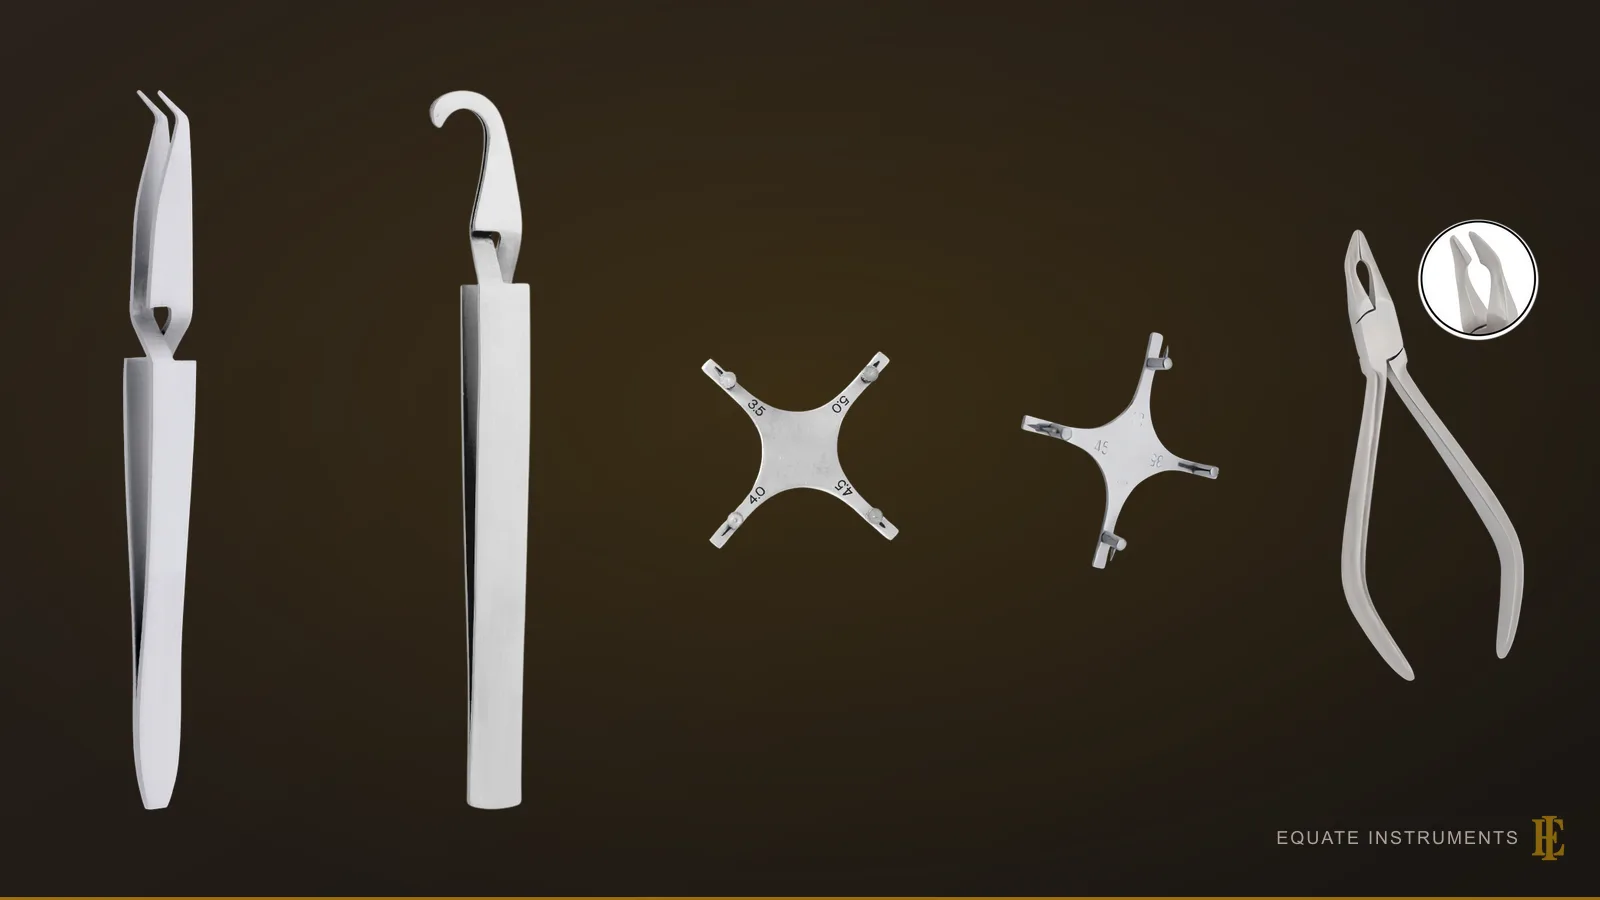
A bracket bonding setup is the tray for bonding orthodontic brackets directly to the teeth. It holds a cheek retractor, mirror, explorer and scaler, a bracket holding tweezer or bracket holder, a bracket positioning gauge and a Weingart plier, with pumice, etchant, primer, adhesive, a curing light and suction. Teeth are cleaned, etched and primed, then brackets are placed, measured and cured.
Key points
- A dry, uncontaminated enamel surface matters as much as the adhesive; most of the tray exists to keep the field clean and dry.
- The tweezer carries and adjusts the bracket, the gauge sets its height, and the light cures it only once both are right.
- Remove adhesive flash before curing; it is far harder to clear afterwards.
Step by step
- 1
Retract and clean
Place the cheek retractor one side at a time and check that no tissue is trapped. Polish the labial surfaces with a fluoride-free, oil-free pumice, then rinse.
- 2
Isolate and dry
Isolate with cotton rolls or cheek pads and a saliva ejector, then dry the enamel with oil-free air.
- 3
Etch, rinse and dry
Apply etchant to the bonding area only, for the time the adhesive maker specifies, then rinse well and dry until the etched enamel looks frosty. Re-etch any area touched by saliva.
- 4
Prime
Paint a thin, even layer of primer over the etched area and thin it with a gentle stream of air.
- 5
Load and place the bracket
Pick up the bracket with the bracket holding tweezer, butter its base with adhesive and place it on the tooth near the long axis.
- 6
Set height and angulation
Seat the bracket positioning gauge in the slot with its reference edge on the incisal edge or cusp tip, and line the bracket up with the long axis of the crown. Press it home firmly.
- 7
Remove flash and cure
Clear excess adhesive from around the base with an explorer or scaler, then light-cure each bracket for the time the adhesive and light makers specify.
- 8
Place the first archwire
Remove the retractor, insert the initial archwire into the molar tubes and slots with a Weingart plier, and ligate it as on the archwire ligation tray.
Tray checklist
Brackets and tubes come on a placement card in tooth order, so the card sits at the top of the tray and the instruments run left to right below it. The orthodontic instruments guide explains each instrument and the brackets themselves.
| Instrument | What it is for | Guide |
|---|---|---|
| Cheek retractor | Hold lips and cheeks off the labial surfaces | Cheek retractor |
| Mouth mirror, explorer, cotton pliers | Inspect, handle cotton rolls, clear flash | Mouth mirrors |
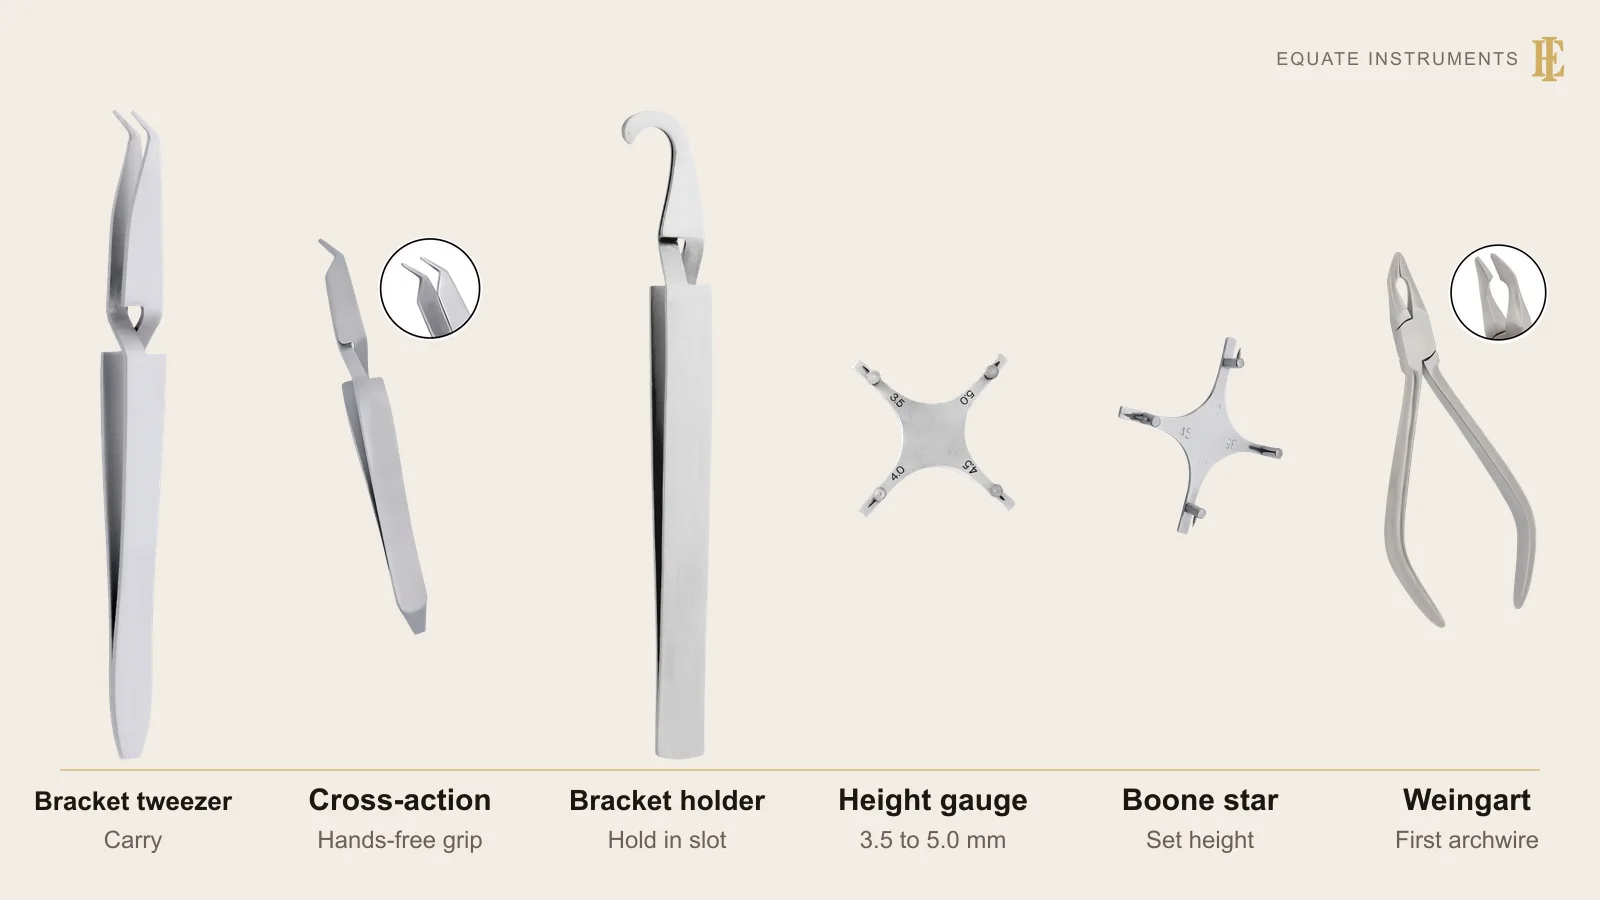
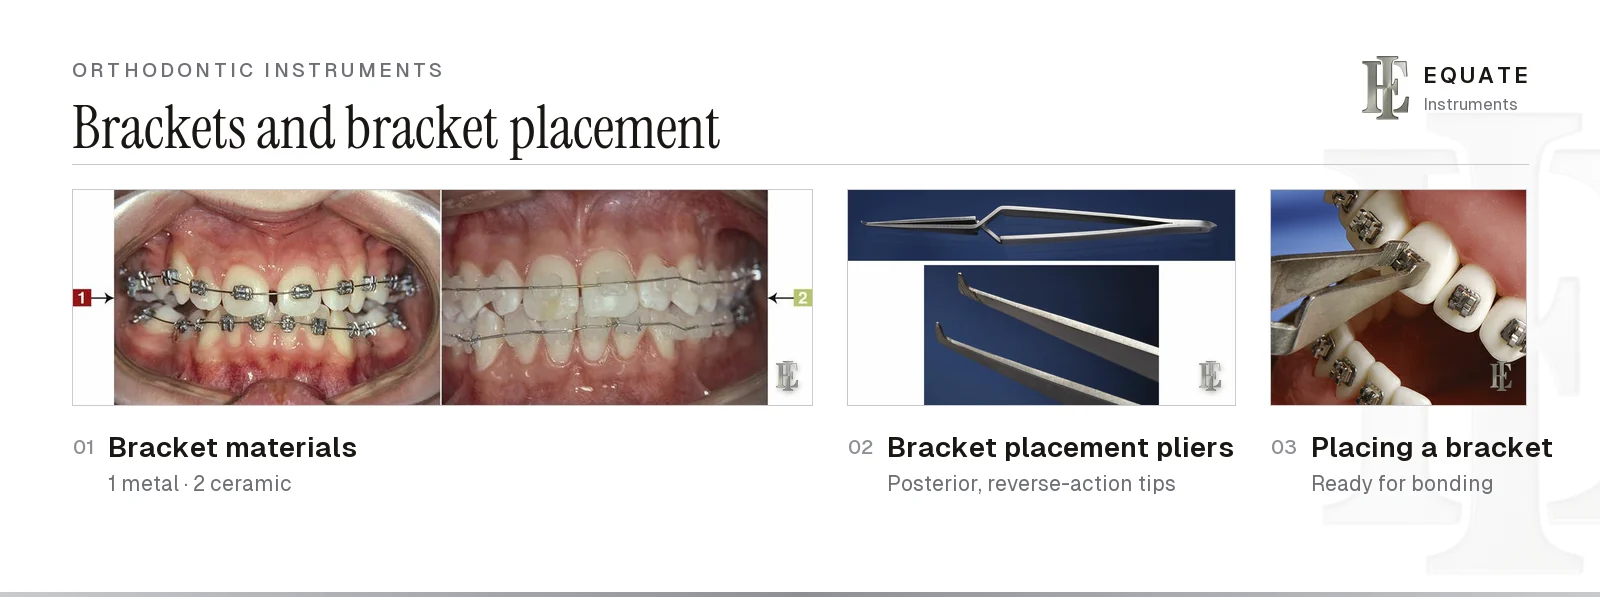
| Bracket holding tweezer | Carry, place and adjust each bracket; reverse-action types stay closed so it can't drop. Boyd's bracket placement pliers, anterior and posterior, do the same job | Bracket holding tweezer |
| Bracket holder | Hold the bracket in its slot while it is pressed and cured | Bracket holder |
| Bracket positioning gauge | Set the vertical bracket height | Bracket positioning gauge |
| Orthodontic scaler | Remove adhesive flash before curing, help seat brackets and check for loose ones | Band pusher (scaler end) |
| Weingart plier | Insert the first archwire | Weingart plier |
| Distal end cutter | Trim the archwire behind the molar tube | Distal end cutter |
What happens at each stage of bonding?
Direct bonding rests on two older findings. Michael Buonocore described a simple way of increasing resin adhesion to enamel in 1955, and George Newman reported bonding orthodontic attachments with epoxy adhesives in 1965. Modern systems have changed the chemistry, but the stages are the same.
| Stage | Purpose | Notes and evidence |
|---|---|---|
| Pumice prophylaxis | Remove pellicle and plaque | Use fluoride-free, oil-free pumice. With conventional etching it made no significant difference to bond strength or retention (Lindauer et al., 1997); with a self-etching primer, a split-mouth trial of 508 teeth saw 2.4% failures with pumice and 11.4% without (Lill et al., 2008) |
| Etch | Create a micro-porous enamel surface | A 1988 clinical trial of 1,174 bonds found no difference in failure between 15- and 60-second etching |
| Self-etch primer (alternative) | Etch and prime in one step | A 2022 review of 19 trials found failure rates and adhesive remnant scores similar to separate etch and prime, with shorter bonding time |
| Prime | Wet the etched enamel and link it to the adhesive | Saliva both before and after priming lowered bond strength in a 2002 laboratory study |
| Place and position | Set bracket height, angulation and mesiodistal position | Errors here show up as finishing bends later |
| Cure | Set the adhesive | Follow the adhesive and light makers' times for each bracket |
What else is needed besides the instruments?
- Brackets and tubes on a single-use placement card, in the prescription chosen for the case, and any molar bands already fitted on the separator and banding tray.
- For self-ligating brackets, the small instrument that opens and closes each clip or door; no ligatures are needed. Ceramic brackets are harder and more brittle than metal ones, so note which type is bonded for debonding later.
- Fluoride-free, oil-free pumice and a prophy cup, etchant, primer, adhesive and microbrushes.
- A curing light, checked for output, and an orange light shield.
- Cotton rolls or cheek pads, a saliva ejector and high-volume suction.
- The initial archwire, elastomeric modules or ligatures, gloves, mask and eye protection for the patient and team.
- Afterwards the used placement card goes in the general waste and any brackets that are discarded go in a sharps container, according to national rules.
How is the bonding tray reprocessed?
Tweezers, gauges, scalers and pliers touch saliva and mucosa, so they are semi-critical items that the CDC advises are cleaned and heat-sterilised when they tolerate heat. Wipe adhesive off tweezer tips and gauge seats before it sets, because cured composite is hard to remove without scratching. Clean pliers open, check that tweezer tips still close without a gap and that gauge arms are straight, then pack and sterilise hinged items open and unlocked with an internal indicator. Check the external indicator when the load comes out and the internal one when the pack is opened. Curing-light tips and other items that can't be heat-sterilised need a barrier or the manufacturer's disinfection method. Follow each manufacturer's ISO 17664-1 instructions and, in England, HTM 01-05.
What are the common mistakes?
- Letting saliva touch etched or primed enamel and carrying on without re-etching.
- Over-etching beyond the bracket base, which leaves rough enamel to stain and collect plaque.
- Curing before checking height and angulation with the gauge.
- Leaving adhesive flash around the base, where it traps plaque.
- Using a tweezer with misaligned tips, so the bracket rotates as it is released.
Build this tray with Equate
Equate lists 14 bracket and buccal tube tweezers, including cross-action bonding tweezers in 11.5, 13 and 14 cm, slot-aligner versions and a 16 cm serrated extra-long tweezer, plus a 14 cm direct bonding bracket holder. There are 11 positioning and height gauges: Boone star-type, improved and fully adjustable gauges, a four-arm gauge stamped 3.5 to 5.0 mm, and slot gauges for .018 and .022 inch. The 19 Weingart pliers include slim, long, mini, 90-degree and tungsten carbide versions, and the range also has a double-sided orthodontic cheek retractor.
All are passivated stainless steel, ultrasonically cleaned, shape-, boil- and performance-tested and individually packed, and designed in Finland. Clinics can request samples and a quote. At the end of treatment the bracket debonding setup reverses this tray.
The Equate difference
Equate lists 45 references across the 5 subcategories on this tray: 14 bracket and buccal tube tweezers (cross-action patterns from 11.5 to 14 cm), a 14 cm direct bonding bracket holder, 11 positioning and height gauges for .018 and .022 inch slots, including Boone star-type and fully adjustable models, and 19 Weingart pliers.
Equate Bracket Bonding Setup options

Bracket Positioning Tweezer 12 cm
EI-0680
Orthodontic Bracket Height Gauge with 3.5, 4.0, 4.5 and 5.0 mm Arms
EI-0682
Bracket Holding Tweezers 12 cm
EI-0689
Bracket Placing Tweezers 13 cm
EI-0690
Weingart Orthodontic Pliers TC (0.71mm / .028 in Wire)
EI-0722
Long Weingart Pliers - Max 0.71mm (.028") Wire
EI-0723
Bracket Positioning Tweezer 12 cm
EI-2556
Deluxe Bracket Holder Tweezer 12 cm
EI-2557
Bracket Positioning Gauge for 0.018" Slot
EI-2558
Bracket Positioning Gauge for 0.022" Slot
EI-2559
Long Weingart Pliers - Max 0.71mm (.028") Wire
EI-2587
Long Weingart Pliers - Tungsten Carbide
EI-2588Browse all orthodontic instruments
Buying in your market
Frequently asked questions
What instruments are needed to bond brackets?
A cheek retractor, mirror and explorer, a bracket holding tweezer or bracket holder, a bracket positioning gauge, a scaler for flash, and a Weingart plier for the first archwire, plus etch, primer, adhesive and a curing light.
How long should enamel be etched for bracket bonding?
Follow the adhesive maker's instructions. A 1988 clinical trial found no difference in bond failure between 15 and 60 seconds of etching, so longer etching is not needed for strength.
What happens if saliva contaminates the etched tooth?
Bond strength can fall. Rinse, dry and re-etch briefly before priming again, or use a primer the maker states tolerates moisture.
What is a bracket positioning gauge for?
It sets the vertical height of the bracket slot from the incisal edge or cusp tip, so brackets on similar teeth sit at consistent heights.
Why is a Weingart plier on the bonding tray?
It inserts the first archwire into the molar tubes and bracket slots once the brackets are cured, so the appliance is active at the end of the bonding visit.
Do teeth need pumicing before bracket bonding?
It depends on the etch. With conventional phosphoric acid etching, a 1997 study found pumicing made no significant difference to bond strength or bracket retention. With a self-etching primer, a 2008 split-mouth trial of 508 teeth had 2.4% failures where teeth were pumiced and 11.4% where they were not, so pumice is worth keeping for self-etch systems.
Self-etch primer or etch and prime?
Either works. A 2022 systematic review of 19 randomised trials found no significant difference in bracket failure at 6, 12 or 18 months or more, or in adhesive remnant scores. Self-etch primers saved bonding time, though the pumice step they need may use up some of that saving.
References
- Proffit WR, Fields HW, Larson BE, Sarver DM. Contemporary Orthodontics, 6th edition. Elsevier, 2018 (bonding and bracket placement)
- Buonocore MG. A simple method of increasing the adhesion of acrylic filling materials to enamel surfaces. Journal of Dental Research 34(6):849-853, 1955
- Newman GV. Epoxy adhesives for orthodontic attachments: progress report. American Journal of Orthodontics 51(12):901-912, 1965
- Kinch AP, Taylor H, Warltier R, Oliver RG, Newcombe RG. A clinical trial comparing the failure rates of directly bonded brackets using etch times of 15 or 60 seconds. American Journal of Orthodontics and Dentofacial Orthopedics 94(6):476-483, 1988
- Bishara SE, Oonsombat C, Ajlouni R, Denehy G. The effect of saliva contamination on shear bond strength of orthodontic brackets when using a self-etch primer. Angle Orthodontist 72(6):554-557, 2002
- Kohn WG, Collins AS, Cleveland JL, Harte JA, Eklund KJ, Malvitz DM. Guidelines for Infection Control in Dental Health-Care Settings, 2003. MMWR Recommendations and Reports 52(RR-17), Centers for Disease Control and Prevention, 2003
- Department of Health. Health Technical Memorandum 01-05: Decontamination in primary care dental practices, 2013 edition
- Boyd LB. Dental Instruments: A Pocket Guide, 7th edition. Elsevier, 2020. Chapter 14, Orthodontic Instruments (photographs used under licence)
- Lindauer SJ, Browning H, Shroff B, Marshall F, Anderson RH, Moon PC. Effect of pumice prophylaxis on the bond strength of orthodontic brackets. American Journal of Orthodontics and Dentofacial Orthopedics 111(6):599-605, 1997
- Lill DJ, Lindauer SJ, Tüfekçi E, Shroff B. Importance of pumice prophylaxis for bonding with self-etch primer. American Journal of Orthodontics and Dentofacial Orthopedics 133(3):423-426, 2008
- Kerayechian N, Bardideh E, Bayani S. Comparison of self-etch primers with conventional acid-etch technique for bonding brackets in orthodontics: a systematic review and meta-analysis. European Journal of Orthodontics 44(4):385-395, 2022
I am a…