Composite Restoration Tray Setup (Class I to V)
Written by the Equate Instruments Technical Team · Reviewed by the Medical & Dental Board, Equate Instruments · Updated ·
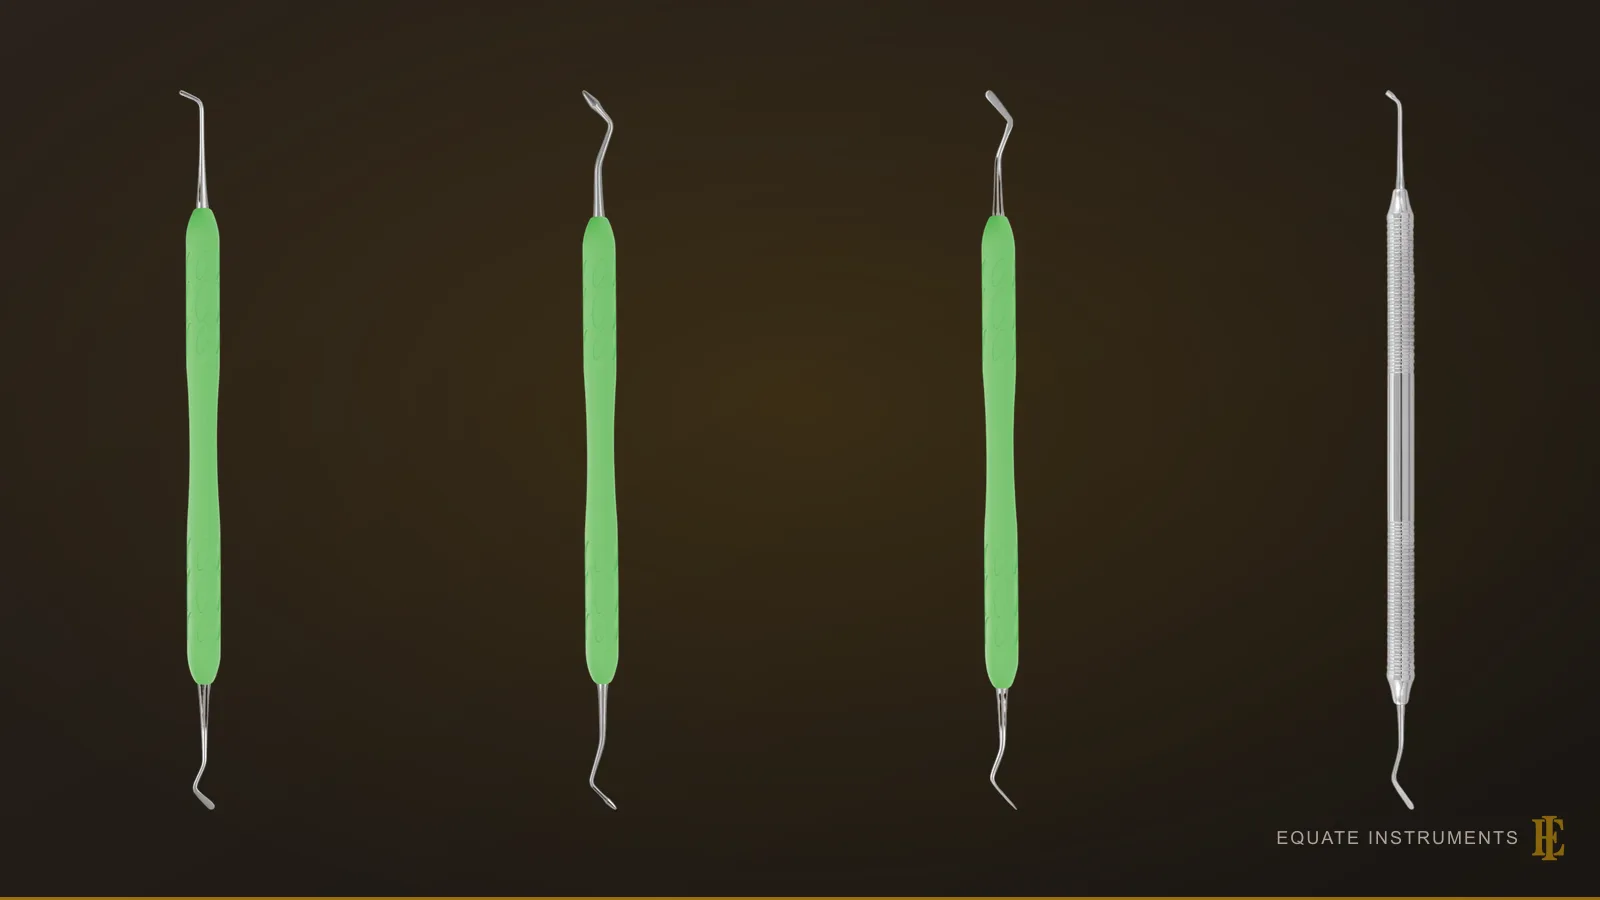
Lay a composite tray out in the order of use: mirror, explorer and cotton pliers, a spoon excavator, the matrix and wedges, applicators and a covered well for bonding, composite placement instruments, a burnisher or modeller, a gold carving knife and finishing strips. Class III and IV trays use a clear strip; Class I, II and V trays use a sectional band, separating ring and ring forceps.
Key points
- Plan two trays: a clear-strip setup for anterior Class III and IV, and a sectional-matrix setup for Class I, II and V.
- A systematic review of six trials found sectional matrices with separating rings gave tighter Class II contacts than circumferential bands.
- Coated (titanium nitride) or resin placement instruments resist scratching and stay smooth, so they drag composite less than worn bare steel.
Step by step
- 1
Shade and isolate
Select the shade on moist teeth before isolation, because enamel lightens as it dries. Then isolate, preferably with a rubber dam, which may improve six-month survival of cervical composites compared with cotton rolls, although the evidence is of low certainty.
Rubber Dam Clamps, Forceps, Punches and Frames: Which to Choose
- 2
Prepare the cavity
Remove caries with burs and a spoon excavator, keeping the preparation conservative. Composite bonds to tooth, so it doesn't need the retention form an amalgam cavity does.
- 3
Place the matrix
For Class II, seat a sectional band, wedge it and place the separating ring with ring forceps. For Class III and IV, pass a clear strip through the contact and wedge it.
Tofflemire and Other Matrix Band RetainersRubber Dam Clamps, Forceps, Punches and Frames: Which to Choose
- 4
Etch, prime and bond
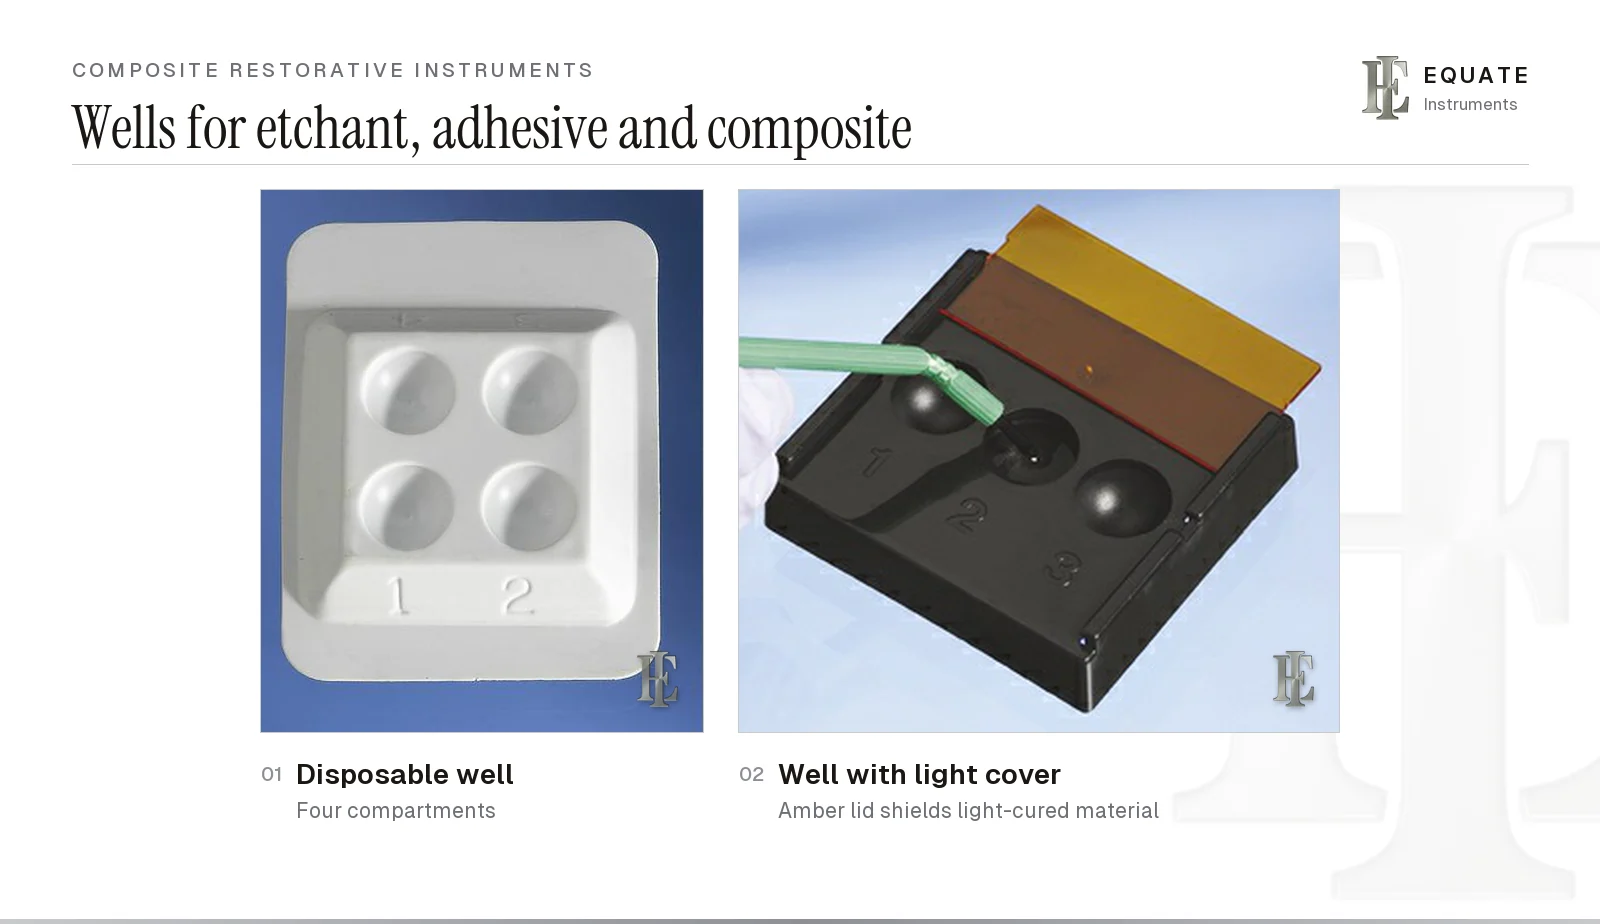
Apply the adhesive system exactly as its instructions say, from a covered well with a fresh single-use brush for each liquid, and light-cure it.
Composite Restorative Instruments, from Matrix Band to Finishing Strip
- 5
Build the proximal wall
In a Class II cavity, build the missing proximal wall against the band first, turning the cavity into a simpler Class I shape.
Dental Composite Instruments: Placement, Sculpting and the Composite Gun
- 6
Place and cure in increments
Place composite in layers no thicker than the material allows, adapt each with a placement instrument or plugger, and cure each layer.
Dental Composite Instruments: Placement, Sculpting and the Composite Gun
- 7
Shape the anatomy
Sculpt fissures and ridges with a fine composite instrument or burnisher before the last cure, so less finishing is needed later.
Dental Composite Instruments: Placement, Sculpting and the Composite GunDental Burnishers: Ball, Football, Acorn, T-Ball and Beavertail
- 8
Remove the matrix and finish
Remove the ring, wedge and band, trim flash with a gold carving knife (finishing knife), and smooth the proximal surface with a finishing strip, keeping its plain centre in the contact. Check the contact with floss.
- 9
Check the bite and polish
Remove the dam, check occlusion with articulating paper, adjust, and polish with discs, cups or points.
How do the Class III and IV and the Class I, II and V trays differ?
Both composite trays share the basic exam instruments, an excavator and composite placement instruments; they differ in the matrix and the finishing kit. Anterior cavities need a clear matrix that lets curing light through and a shade guide in view, while posterior and cervical cavities need a band that recreates a tight contact.
| Element | Class III and IV (anterior) | Class I, II and V (posterior and cervical) |
|---|---|---|
| Matrix | Clear polyester strip, sometimes with a strip clamp | Sectional band with separating ring for Class II; none or a cervical form for I and V |
| Wedges | Thin wooden or clear wedges | Anatomical wedges sized to the embrasure |
| Placement instruments | Coated metal and resin placement instruments, thin anterior spatula, sculpting brush | Coated metal and resin placement instruments, plugger, modeller, coated composite burnisher |
| Forceps | None; a strip clamp may hold the clear strip | Ring forceps, often rubber dam clamp forceps |
| Finishing | Gold carving knife (finishing knife), crown and bridge scissors, discs, fine strips | Gold carving knife (finishing knife), strips, burs and points |
| Shade | Shade guide on the tray | Shade guide on the tray |
Tray checklist
| Instrument | What it is for | Guide |
|---|---|---|
| Mirror, explorer, cotton pliers | Examination and handling small items | Basic tray |
| Spoon excavator | Removing soft carious dentine | Spoon excavators |
| Composite placement instruments (anterior and posterior) | Carrying, adapting and shaping composite | Composite instruments |
| Composite burnisher or modeller | Smoothing surfaces and forming fissures | Burnishers |
| Covered well, liner applicator, colour-coded applicator brushes | Keeping bonding liquids and composite away from light; applying liner and adhesive | Composite restorative instruments |
| Gold carving knife (finishing knife) | Trimming flash at the margins | Carvers |
| Sectional matrix, separating ring, wedges | Recreating the proximal wall and contact | Matrix band retainers |
| Ring forceps | Opening and placing the separating ring | Rubber dam instruments |
| Clear strip, finishing strips, articulating paper forceps | Anterior matrix, proximal finishing, bite check | Restorative instruments |
Why use a sectional matrix for Class II composites?
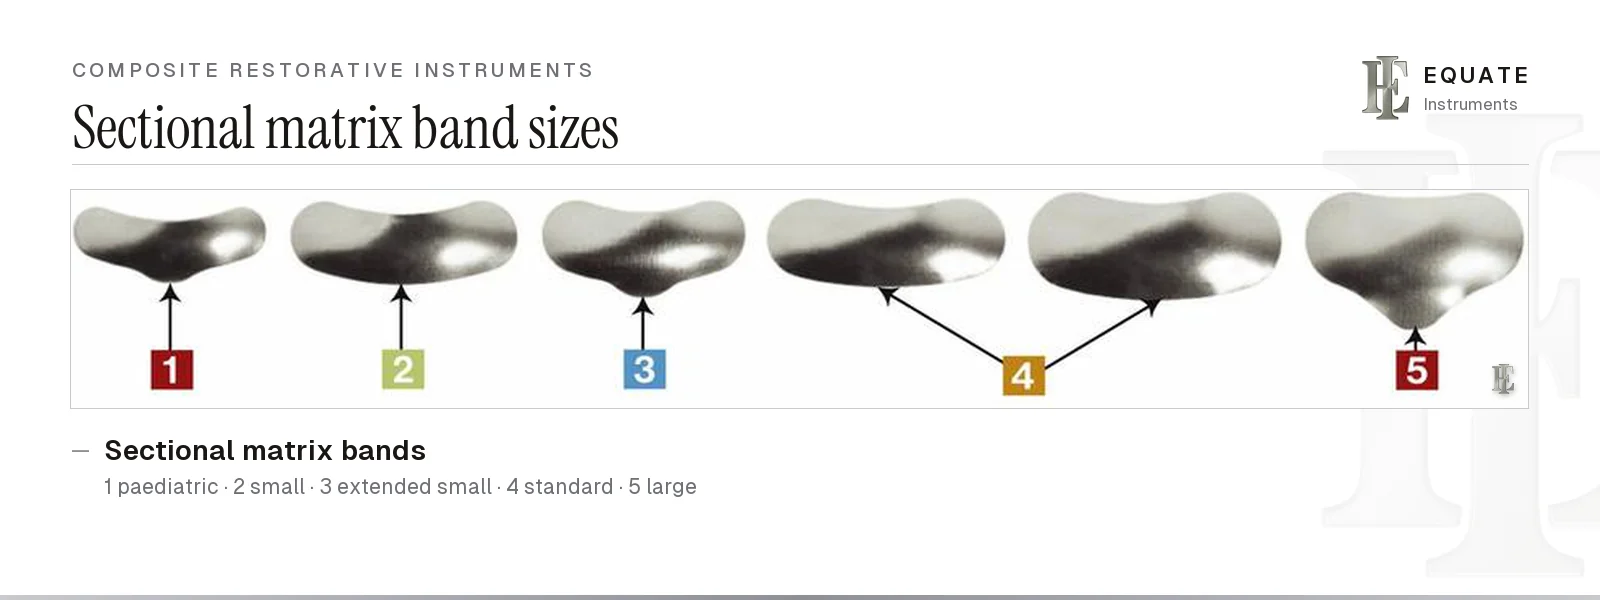
Composite doesn't push a band outwards the way condensed amalgam does, so the contact has to come from the matrix system. A sectional band is thin and contoured, and the separating ring wedges the teeth slightly apart while it's in place; when the ring comes off, the teeth spring back against the restoration. Choose the band by the depth of the box, from a paediatric size for primary molars to a large one for a deep cervical box; the composite restorative instruments guide shows the range.
A 2025 systematic review in Cureus by Kamble and colleagues pooled six randomised trials and found that sectional matrices with separating rings gave tighter, better proximal contacts in Class II composites than circumferential retainer-and-band systems, with similar operator satisfaction. A circumferential matrix retainer is still useful where several surfaces are missing or a ring won't seat.
What else is needed besides the instruments?
A composite tray also needs local anaesthetic, isolation (a rubber dam is usually preferred for adhesive work, although a 2021 Cochrane review rated the survival evidence as low or very low certainty), burs in a bur block, an etchant, primer and bonding agent with single-use applicator brushes, the composite itself in compules or syringes, a curing light with eye protection, a shade guide, finishing strips and discs, articulating paper and floss. The local anaesthetic tray and the rubber dam tray are usually set up beside it.
Set the light-sensitive items out last and keep them covered, because the operating light starts to cure composite on an open pad. A well with an amber cover keeps the adhesive and each shade workable, and a different colour of applicator for each liquid stops etchant reaching the adhesive. Check the curing light with a radiometer with its barrier sleeve fitted: the ADA reports that barriers can cut output by as much as 40%.
How are composite instruments reprocessed?
Wipe uncured composite off the working ends with gauze or an alcohol wipe during the procedure; once composite is cured on an instrument it has to be removed mechanically, which can scratch a coated tip. After use, composite instruments are cleaned and heat sterilised as semicritical items under the CDC's 2003 guidelines, ideally in a cassette with the rest of the set.
HTM 01-05 recommends single-use matrix bands, and brushes and compule tips are single-use too. Sectional rings and ring forceps are reprocessed with the tray; follow the manufacturer's instructions (ISO 17664) and avoid abrasive pads on coated tips. Retire an instrument when its coating is worn through or its edge is bent.
What are the common mistakes on a composite tray?
- Choosing the shade after the teeth have dried under the dam.
- Using a scratched bare steel spatula that drags composite off the wall.
- Leaving the composite or bonding agent uncovered under the operating light.
- Forgetting to wedge a sectional band, which leaves a gingival overhang.
- Placing increments thicker than the material can cure through.
- Checking the curing light without its barrier sleeve, which hides a loss of output of up to 40%.
Build this tray with Equate
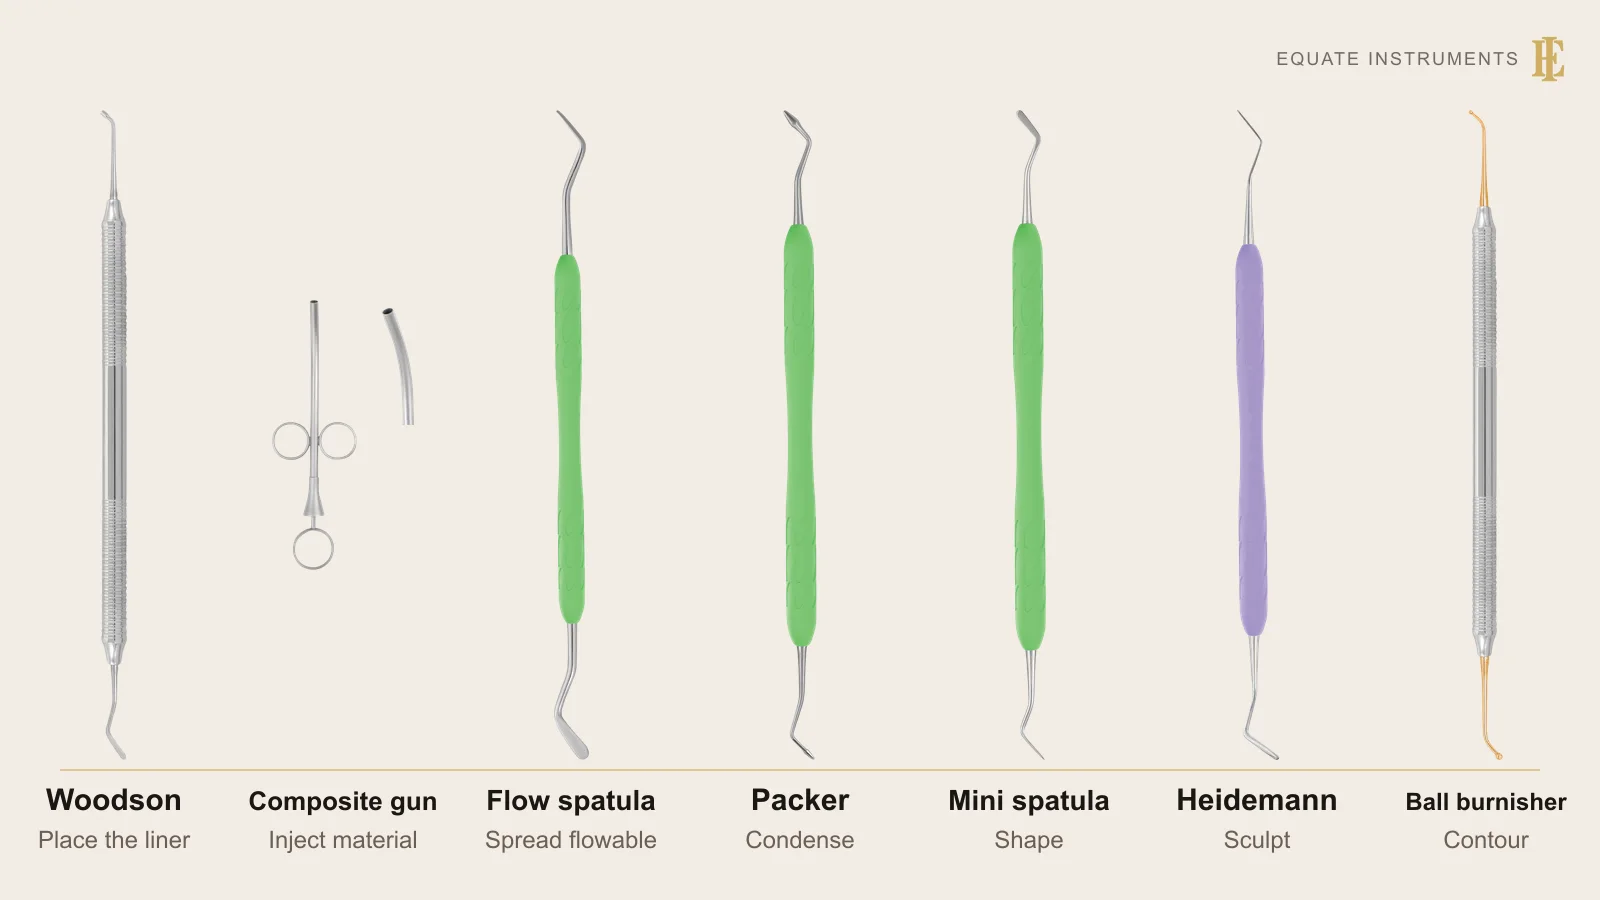
The Equate restorative range covers the placement side of both composite trays: anterior and posterior plastic filling instruments, Woodson and flow spatulas, Heidemann spatulas in solid or flexible versions, packer-modellers, non-stick titanium-coated and gold-coloured coated instruments, curved application guns and five- to ten-piece composite kits in plastic trays or stainless cassettes. Handles come in solid 6 mm, hollow 10 mm and colour-coded silicone versions.
The instruments are designed in Finland and made from passivated stainless steel, ultrasonically cleaned, shape-, boil- and performance-tested and individually packed. Clinics can request samples and a quote, for example to compare coated and uncoated tips with their own composite.
The Equate difference
Equate lists 66 composite references in the 11 subcategories on this page: 26 composite spatulas and plastic filling instruments, 12 Heidemann spatulas from 1.5 to 3.0 mm, 7 pluggers and modellers, 12 non-stick spatulas, burnishers, carvers and packers, 2 curved application guns and 7 ready-made composite kits.
Equate Composite Restoration Tray Setup (Class I to V) options

Composite Knife / Carver - Non-Stick Double-Ended
EI-0022
Heidemann Flex Composite Spatula 2.0 mm - Solid Handle
EI-0048
Heidemann Composite Spatula 2.5 mm - Solid Handle
EI-0049
Heidemann Flex Composite Spatula 3.0 mm - Solid Handle
EI-0050
Composite Instrument Anterior - Double-Ended Hollow Handle
EI-0097
Composite Spatula 2.5mm - Knurled Hollow Handle
EI-0098
Composite Plugger 1.6mm/1.3mm - Knurled Handle
EI-0101
Composite Plugger No. 2 Flat - Double-Ended Knurled Handle
EI-0102
Composite Trimmer - Hollow Handle
EI-0103
Anterior Composite Placement Instrument 1.7/1.2 mm, Solid Handle 6 mm
EI-0166
Heidemann Flexible Spatula 2.5 mm - 6 mm Solid Handle
EI-0167
Composite Instrument UP1 - Double-Ended Solid Handle
EI-0193Browse all restorative & operative instruments
Buying in your market
Frequently asked questions
What goes on a Class II composite tray, in order of use?
Mirror, explorer and cotton pliers; a spoon excavator; a sectional band, wedges, separating ring and ring forceps; applicator brushes and a covered well for the adhesive; coated and resin placement instruments and a plugger; a coated burnisher; a gold carving knife, finishing strip and floss; then articulating paper for the bite check.
What matrix is used for a Class III or IV composite?
A clear polyester strip passed through the contact and wedged, so curing light can pass through it and the proximal surface is formed smoothly.
What are the forceps on a composite tray for?
They open and place the separating ring of a sectional matrix. Many practices use rubber dam clamp forceps for this.
Should the shade be chosen before the rubber dam goes on?
Yes. Teeth lighten as they dry under the dam. In a 2023 clinical study the colour difference kept growing over 30 minutes of isolation, and a 2025 study found the change became noticeable after 5 minutes of drying and clinically unacceptable after 15, with some teeth still not back to their own colour 24 hours later. Match the shade on moist teeth first.
References
- Kamble S, Ramugade M, Sayed A, Sapkale K, Gulhane A, Magar A. The effectiveness of circumferential and sectional matrix systems in obtaining optimum proximal contact in Class II composite restorations: a systematic review. Cureus 2025;17(5):e84967
- Heymann HO, Swift EJ, Ritter AV (eds). Sturdevant's Art and Science of Operative Dentistry, 6th ed. Elsevier, 2013 (composite restorations, Class I to V)
- Kohn WG, Collins AS, Cleveland JL, Harte JA, Eklund KJ, Malvitz DM. Guidelines for Infection Control in Dental Health-Care Settings, 2003. MMWR 2003;52(RR-17). Centers for Disease Control and Prevention
- Department of Health (England). Health Technical Memorandum 01-05: Decontamination in primary care dental practices, 2013 edition
- Boyd LB. Dental Instruments: A Pocket Guide, 7th edition. Saunders/Elsevier, 2020. Chapter 9, Composite Restorative Instruments (photographs used under licence)
- Bird DL, Robinson DS. Modern Dental Assisting. Elsevier (assisting with composite restorations)
- American Dental Association. Dental Curing Lights (Oral Health Topics)
- Miao C, Yang X, Wong MC, et al. Rubber dam isolation for restorative treatment in dental patients. Cochrane Database of Systematic Reviews 2021;5:CD009858
- Alamé C, Mehanna Zogheib C. The effect of dehydration on tooth color: a prospective in vivo study. Cureus 2023;15(11):e48140
- Haciali C, Korkut B, Yanikoglu F. Clinical assessment of dental color during dehydration and rehydration by various dental photography techniques. Odontology 2025;113(4):1558–1572
I am a…
Related
- Dental Composite Instruments: Placement, Sculpting and the Composite Gun
- Tofflemire and Other Matrix Band Retainers
- Restorative Dental Hand Instruments
- Amalgam Restoration Tray Setup
- Rubber Dam (Dental Dam) Tray Setup and Placement
- Composite Restorative Instruments, from Matrix Band to Finishing Strip
- Dental Burnishers: Ball, Football, Acorn, T-Ball and Beavertail
- Spoon Excavators (Dental Excavators)
- Dental Carvers: Types of Carvers in Dentistry and the Lab
- Basic Dental Tray Setup (Dental Exam Tray)