Suture Removal Tray Setup
Written by the Equate Instruments Technical Team · Reviewed by the Medical & Dental Board, Equate Instruments · Updated ·
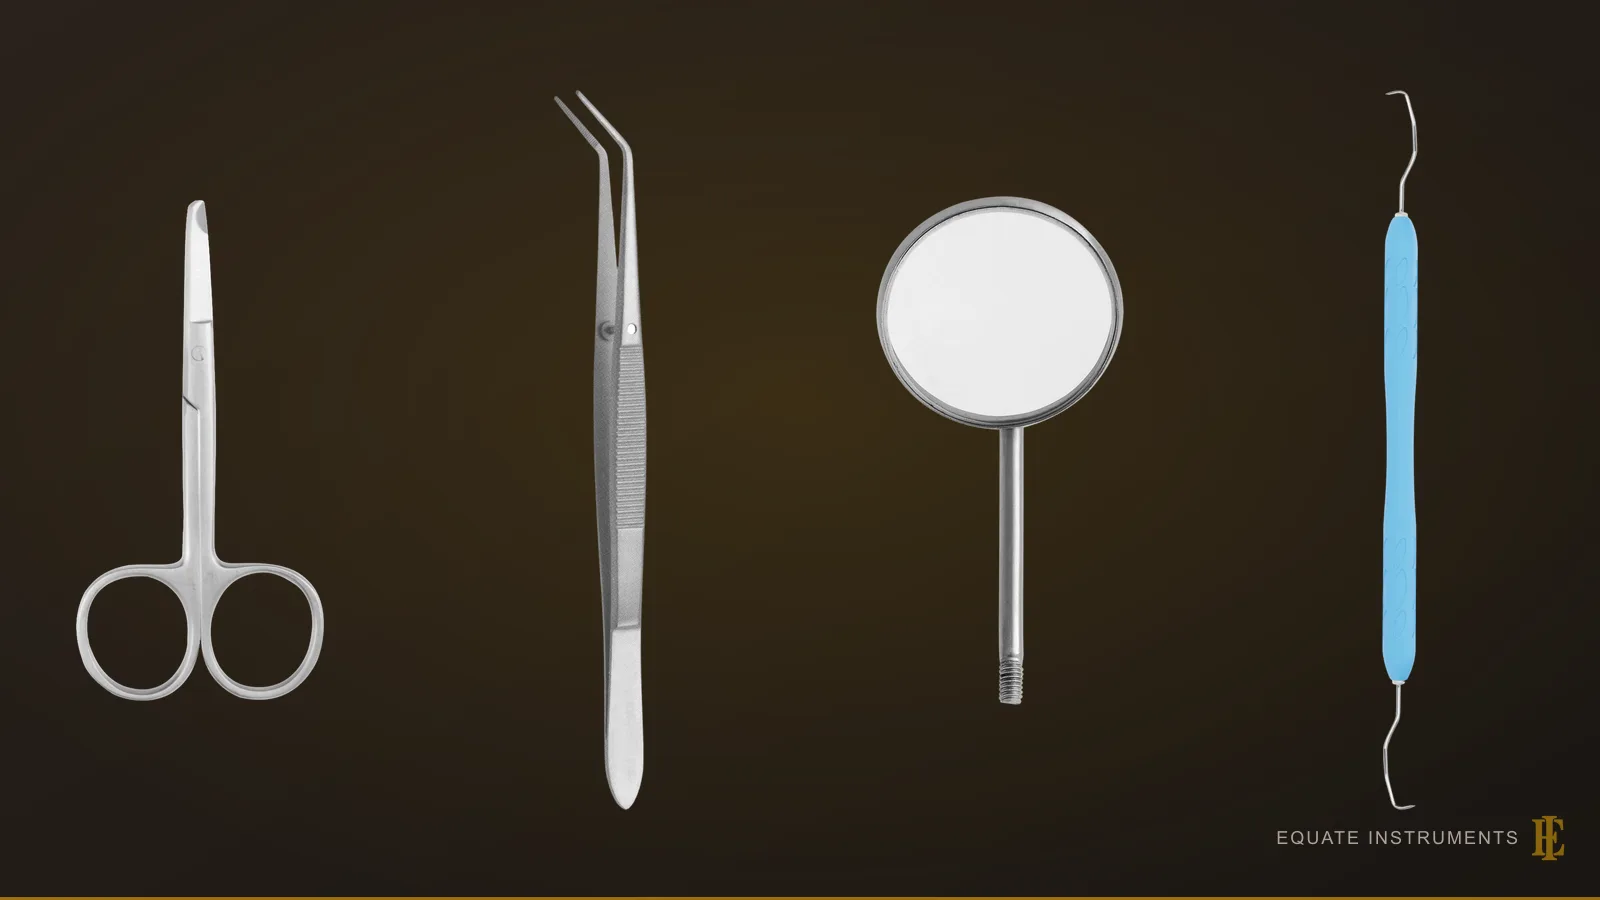
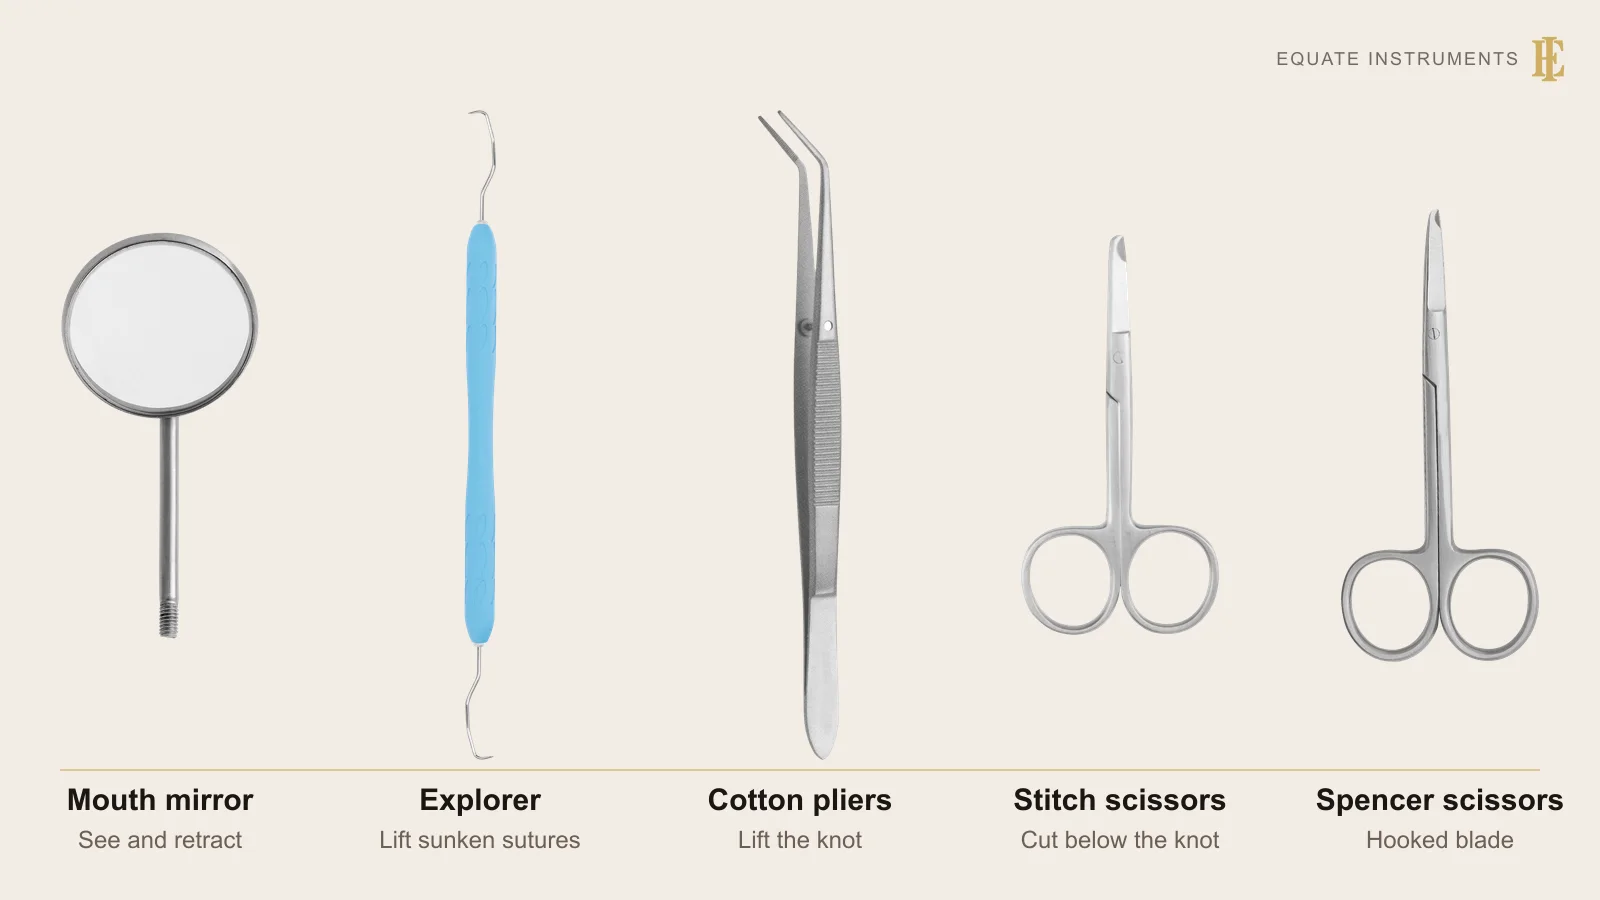
A suture removal tray setup is a small tray for taking out stitches after oral surgery: a mouth mirror, a pigtail explorer, cotton pliers or tissue forceps to lift each suture, sharp suture scissors to cut it, moist gauze, suction and an air/water syringe tip. Non-resorbable sutures usually come out 7 to 14 days after surgery.
Key points
- The tray is short: a mirror, a pigtail explorer, cotton pliers, suture scissors, gauze, suction and an air/water syringe tip.
- Cut each suture next to the tissue so the part that sat in the mouth is not pulled back through the wound.
- Count the sutures you remove against the number recorded at surgery before the patient leaves.
Step by step
- 1
Check the notes
Read the operation note for the number, type and position of the sutures, and the date they were placed. Confirm that the sutures are non-resorbable or still present and need removing.
- 2
Inspect the wound
Retract with the mirror and look at the wound edges under good light. If the wound is gaping, infected or bleeding, leave the sutures and review rather than removing them.
- 3
Clean the site
Wipe debris and plaque off the sutures with moist gauze held in cotton pliers so each knot can be seen clearly.
- 4
Lift the knot
Grip the knot or tail with cotton pliers, fine tissue forceps or a haemostat and lift it gently away from the mucosa. Use the explorer tip to tease out a suture that has sunk into swollen tissue.
Dental Cotton Pliers (Dental Tweezers)Dental Tissue Forceps (Toothed and Non-Toothed)Dental Hemostats (Haemostats) and Mosquito Forceps
- 5
Cut next to the tissue
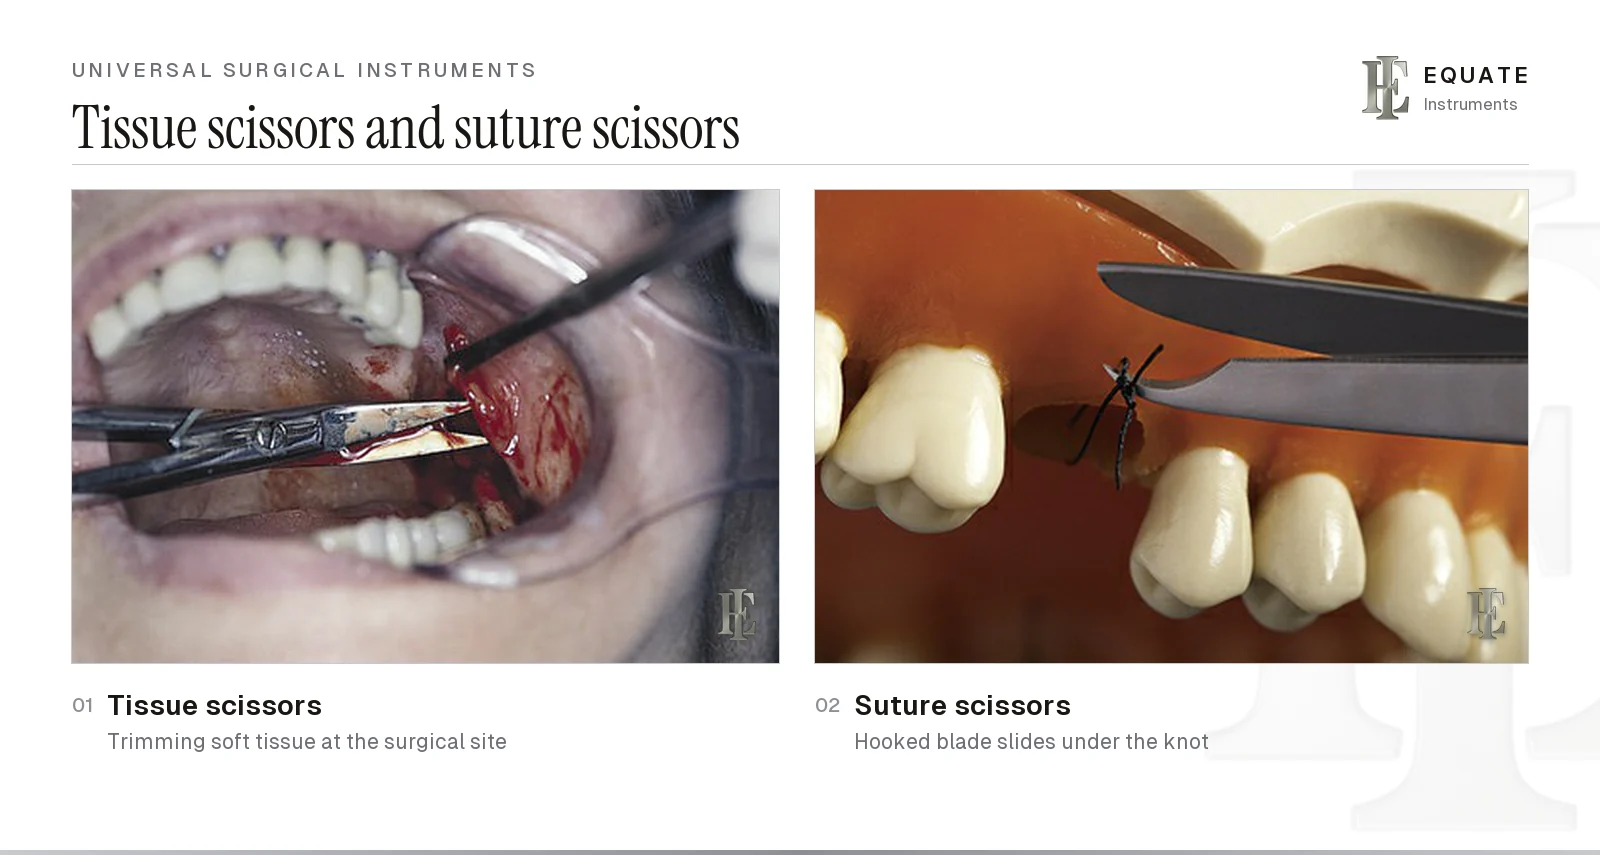
Slide one blade of the suture scissors under the suture on one side of the knot, as close to the mucosa as possible, and cut once.
- 6
Pull towards the wound
Draw the suture out by the knot, pulling towards the wound line so the healing edges are not pulled apart. After major surgery, remove alternate sutures first and check that the wound holds.
- 7
Count, clean and advise
Lay each removed suture on gauze, count them against the operation note and check that no fragment is left. Clean the area and give oral hygiene advice for the next few days.
Tray checklist
Suture removal needs no scalpel, elevator or needle holder, so it has its own tray rather than reusing the universal surgical tray (the universal surgical instruments guide explains each one).
| Instrument | What it is for | Guide |
|---|---|---|
| Mouth mirror | Retract the cheek and see the lingual and palatal sutures | Mouth mirrors |
| Pigtail explorer | Lift a suture that has sunk into tissue | Basic dental instruments |
| Cotton pliers, fine tissue forceps or a haemostat | Grip and lift the knot | Cotton pliers, tissue forceps, haemostats |
| Suture scissors | Cut the suture next to the mucosa (a blade is an alternative) | Surgical scissors |
| Moist gauze | Clean the site and collect removed sutures | Disposable |
| Saliva ejector and high-volume suction tip | Keep the field dry | Surgical suction tips |
| Air/water syringe tip | Rinse and dry the site so each knot can be seen | Evacuation and delivery systems |
When do intraoral sutures come out?
Non-resorbable sutures are removed once the wound has sealed, usually 7 to 14 days after surgery. A 2022 systematic review of oral suture materials by Faris and colleagues advises taking them out as soon as possible, at 6 to 10 days, and the Foundation for Oral Rehabilitation's treatment guideline puts the ideal window at 8 to 12 days. Mattress sutures are often left longer: Kurtzman and colleagues (Dentistry Today, 2005) give 14 to 21 days.
Resorbable sutures are normally left to dissolve. A Hull University Teaching Hospitals NHS Trust aftercare leaflet tells patients this can take up to 14 days, and Guy's and St Thomas' NHS Foundation Trust gives the same two weeks, adding that non-dissolving stitches come out at a follow-up visit or with the patient's own dentist. Loose resorbable sutures that irritate the patient can still be removed at review. The surgeon's own instruction in the notes always takes priority.
| Suture | Typical plan | Source |
|---|---|---|
| Non-resorbable (for example silk or nylon) | Remove at about 8 to 12 days; 6 to 10 days in a 2022 review | Foundation for Oral Rehabilitation guideline; Faris et al. 2022 |
| Mattress sutures | Often left 14 to 21 days | Kurtzman et al., Dentistry Today 2005 |
| Resorbable | Left to dissolve, up to about 14 days | Hull University Teaching Hospitals NHS Trust; Guy's and St Thomas' NHS Foundation Trust |
| After major surgery or with a bleeding disorder | Remove alternate sutures first, then the rest if the wound holds | Foundation for Oral Rehabilitation guideline |
How should a suture be cut and removed?
Cut on one side of the knot, right against the mucosa, then pull the suture out by the knot. That way the length of suture that sat in the mouth, coated in plaque, comes straight out instead of being drawn through the tissue. Pull towards the wound line, never away from it, so the healing edges are pushed together rather than apart.
Sharp, fine-pointed scissors matter more here than anywhere else on the tray. Blunt blades chew the suture and tug on the wound, and thick tips can't slide under a tight stitch. Stitch scissors with a hooked or notched lower blade are made to slip under the suture and hold it while it is cut. The Foundation for Oral Rehabilitation guideline also allows a haemostat to draw the suture and a blade to cut it. Anaesthesia is rarely needed.
What else is needed besides the instruments?
- Gloves, mask and eye protection; sterile gloves are not needed because this is not a surgical procedure.
- Good light and suction, since lingual and palatal sutures are hard to see.
- The operation note recording the number and type of sutures placed.
- A chlorhexidine rinse or oral hygiene advice if the site has heavy plaque.
How is a suture removal tray reprocessed?
The instruments touch mucosa and healing wound margins, so they are at least semi-critical items. The CDC advises that heat-tolerant dental instruments are heat-sterilised, and its 2003 guidelines require cleaning before any sterilisation, ideally in an ultrasonic cleaner or washer-disinfector. Open the scissors fully for cleaning, check that the blades still cut cleanly to the tip and that the cotton pliers close evenly. Lubricate the scissor joint and pack the set with a chemical indicator. Follow the manufacturer's ISO 17664-1 reprocessing instructions and, in England, HTM 01-05.
What are the common mistakes?
- Cutting above the knot, which leaves a fragment buried in the tissue; the Foundation for Oral Rehabilitation warns that a suture left under the mucosa can cause a foreign-body reaction and infection.
- Cutting away from the tissue and pulling the contaminated length of suture through the wound.
- Pulling away from the wound line and opening the edges.
- Using tissue scissors for sutures, which blunts their fine blades.
- Not counting the removed sutures against the operation note.
Build this tray with Equate
Equate lists 20 suture scissors, including stitch scissors in 9, 11, 11.5 and 15 cm, LaGrange, Iris and Goldman-Fox patterns, and 6 with tungsten carbide blades. There are 4 cotton pliers, among them Flagg and Krane-Kaplan angled patterns, 19 college tweezers, 8 of them non-magnetic, and 16 explorers for lifting sunken sutures. All are passivated stainless steel, ultrasonically cleaned, shape-, boil- and performance-tested and individually packed, and designed in Finland. Clinics can request samples and a quote.
The Equate difference
Equate lists 59 instruments across the 4 subcategories on this tray, including 20 suture scissors (6 with tungsten carbide blades, and 4 stitch scissors from 9 to 15 cm), 4 cotton pliers, 19 college tweezers (8 non-magnetic) and 16 explorers.
Equate Suture Removal Tray Setup options

Holst-Style Explorer - Double-Ended Hollow Handle
EI-0041
Explorer Fig. 9 Extra Thin - Hollow Handle 10mm
EI-0110
Weston Explorer - Solid Handle 6mm
EI-0111
Explorer 9-17 - Double-Ended Pigtail Explorer with Grey Ergonomic Handle
EI-0905
Explorer 11-12 Blue
EI-1179
Explorer 11F-12F Flexible, Light Blue
EI-1180
Dental Explorer Fig. 8A Extra Thin - Solid Handle 6mm
EI-1920
Explorer Fig. 17 Hollow Handle 10mm
EI-1925
Dental Explorer Fig. 8A - Hollow Handle 10mm
EI-1928
Explorer Fig. 9 Hollow Handle 10mm
EI-1929
Explorer Fig. 3 Extra Thin - Solid Handle 6mm
EI-1931
Explorer Fig. 3 Hollow Handle 10mm
EI-1932Browse all oral surgery instruments Browse all accessories & supplies instruments Browse all diagnostic instruments
Buying in your market
Frequently asked questions
What instruments are needed to remove dental sutures?
A mouth mirror, a pigtail explorer, cotton pliers, tissue forceps or a haemostat, sharp suture scissors, moist gauze, suction and an air/water syringe tip.
When are stitches removed after oral surgery?
Non-resorbable sutures usually come out 7 to 14 days after surgery; a 2022 review advises 6 to 10 days and one treatment guideline gives 8 to 12 as ideal, and mattress sutures may stay up to 21 days. Resorbable sutures are normally left to dissolve.
Does suture removal need local anaesthetic?
Usually not. It is quick and close to painless when the suture is lifted gently and cut next to the tissue.
Why cut the suture close to the tissue?
So the length of suture that sat in the mouth is not dragged back through the wound when it is pulled out.
What is the difference between suture scissors and stitch scissors?
Suture scissors are any scissors kept for cutting thread; stitch scissors are the hooked or notched type made for removal. The surgical scissors guide compares them with tissue scissors.
Do dissolvable stitches in the mouth need removing?
Usually not. Guy's and St Thomas' NHS Foundation Trust tells patients they normally dissolve within about two weeks. A loose or irritating remnant can still be taken out at review, which the Foundation for Oral Rehabilitation guideline also allows.
References
- Foundation for Oral Rehabilitation. Treatment guidelines, single tooth, surgical aftercare: suture removal
- Hull University Teaching Hospitals NHS Trust. Post-operative mouth care following oral surgery: advice sheet, 2024
- Hupp JR, Tucker MR, Ellis E. Contemporary Oral and Maxillofacial Surgery, 7th edition. Elsevier, 2018 (suturing and postoperative care)
- Kohn WG, Collins AS, Cleveland JL, Harte JA, Eklund KJ, Malvitz DM. Guidelines for Infection Control in Dental Health-Care Settings, 2003. MMWR Recommendations and Reports 52(RR-17), Centers for Disease Control and Prevention, 2003
- Centers for Disease Control and Prevention. Dental infection prevention and control FAQs: sterilization of patient-care items
- Department of Health. Health Technical Memorandum 01-05: Decontamination in primary care dental practices, 2013 edition
- Boyd LRB. Dental Instruments: A Pocket Guide, 7th edition. Saunders/Elsevier, 2020 (photographs used under licence)
- Faris A, Khalid L, Hashim M, et al. Characteristics of suture materials used in oral surgery: systematic review. International Dental Journal 2022;72(3):278–287
- Kurtzman GM, Silverstein LH, Shatz PC, Kurtzman D. Suturing for surgical success. Dentistry Today, 1 October 2005
- Guy's and St Thomas' NHS Foundation Trust. Dental surgery and recovery (patient information)
I am a…
Related
- Oral Surgery Tray Setup
- Surgical Extraction Tray Setup
- Dental Surgical Scissors
- Dental Cotton Pliers (Dental Tweezers)
- Dental Needle Holders (Needle Drivers)
- Universal Surgical Instruments for Oral and Periodontal Surgery
- Dental Tissue Forceps (Toothed and Non-Toothed)
- Dental Hemostats (Haemostats) and Mosquito Forceps