Basic Dental Instruments: Mirror, Explorer, Cotton Forceps and Handles
Written by the Equate Instruments Technical Team · Reviewed by the Medical & Dental Board, Equate Instruments · Updated ·
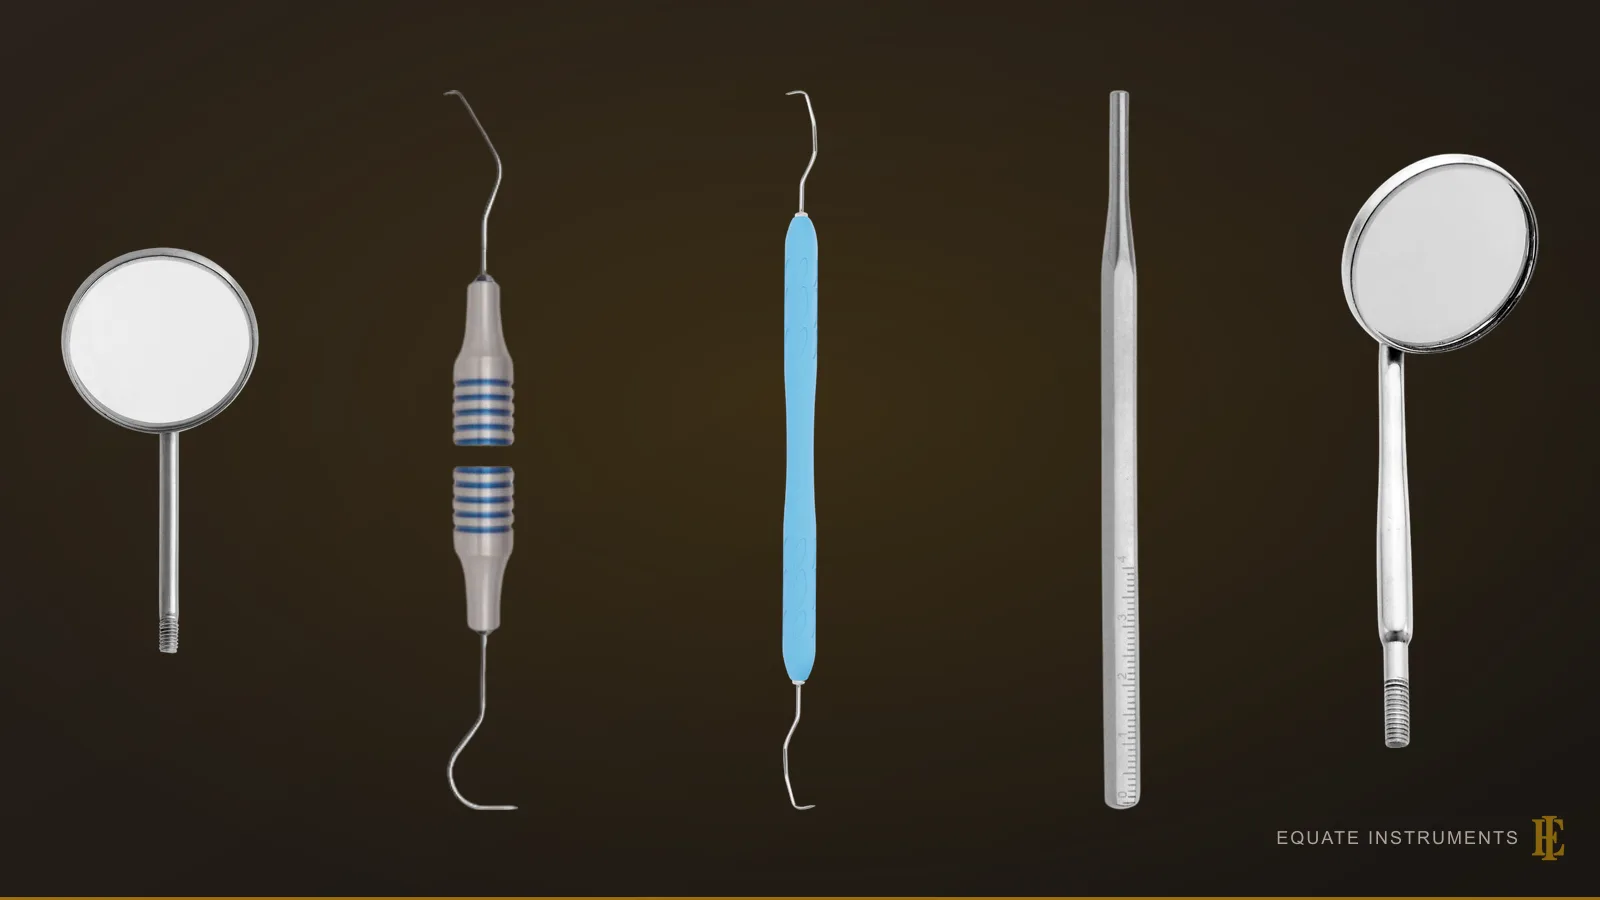
The basic dental instruments are the mouth mirror, the explorer and the cotton forceps (cotton pliers), mounted on instrument handles. The mirror gives indirect vision and retraction, the explorer finds calculus and rough margins by touch, and the cotton forceps carry small items into and out of the mouth. Most examination trays add a periodontal probe to these three.
Key points
- Mirror, explorer and cotton forceps are the basic setup found on almost every tray, from a check-up to a crown preparation.
- Most mirrors and explorers screw into or are fixed to a handle, and the handle's diameter, weight and texture decide how tiring the instrument is to hold.
- All three are critical or semi-critical items: they're cleaned, packed with a process indicator and steam sterilised after every patient.
What are the basic dental instruments?
Dental instrument textbooks start in the same place. Linda Bartolomucci Boyd's Dental Instruments: A Pocket Guide (Elsevier) opens with three instruments, the mouth mirror, the explorer and the cotton forceps, plus the handles they're mounted on, because these appear on nearly every tray in general practice. A restorative, hygiene, endodontic or surgical setup adds instruments to this core; it rarely replaces it.
The three work as a team. The mirror is held in the non-dominant hand to see and retract, the explorer or a periodontal probe works in the dominant hand, and the cotton forceps are picked up whenever something needs placing or removing.
| Instrument | Main job | Common variants |
|---|---|---|
| Mouth mirror | Indirect vision, retraction of cheek and tongue, reflecting light | Front-surface, plain, concave (magnifying), double-sided; No. 4 and No. 5 sizes |
| Explorer | Feeling for caries, calculus, furcations and rough restoration margins | Shepherd's hook, pigtail (cowhorn), Orban; single or double-ended |
| Cotton forceps | Carrying cotton rolls, pellets and small items into and out of the mouth | Plain or serrated, pointed or rounded tips, locking or non-locking |
| Instrument handle | Holding the working end | Slim round, standard, wide or lightweight; fixed or removable working ends |
Mouth mirror: indirect vision, retraction and light
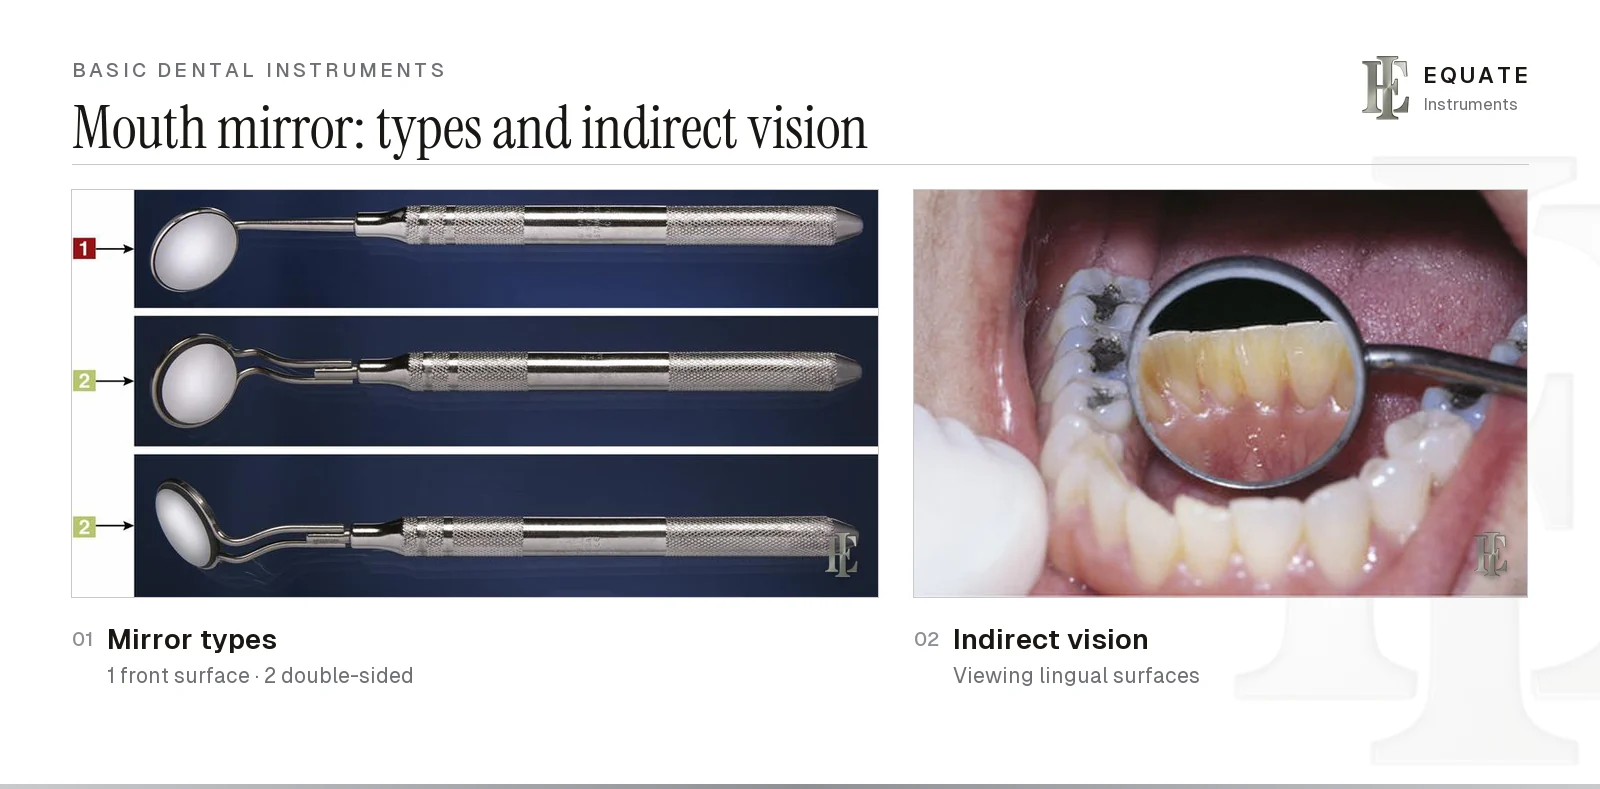
A mouth mirror does three jobs at once. It shows surfaces that can't be seen directly, such as the lingual surfaces of lower incisors or the palatal surfaces of upper teeth; it holds back the lips, cheek and tongue; and it reflects the operating light into the working area. In anterior teeth it can also be used to transilluminate, shining light through the tooth to reveal shadows between contacts.
The glass matters more than most buyers expect. A front-surface mirror has its reflective coating on the outside of the glass, so it gives one sharp, distortion-free image. A plain (rear-surface) mirror reflects twice and shows a faint ghost image, but it's tougher. A concave mirror magnifies, and a double-sided mirror lets the clinician retract the tongue or cheek with one face while viewing with the other. Disposable mirrors usually have flat plastic surfaces.
Size is given as a number that refers to the diameter of the head: No. 4 (22 mm) and No. 5 (24 mm) are the most common. ISO 9873 sets the requirements for intra-oral mirrors, including the thread and cone-socket fittings that join head and handle. For the full range of heads and fittings, see the dental mouth mirrors guide.
Explorers: feeling for caries, calculus and margins
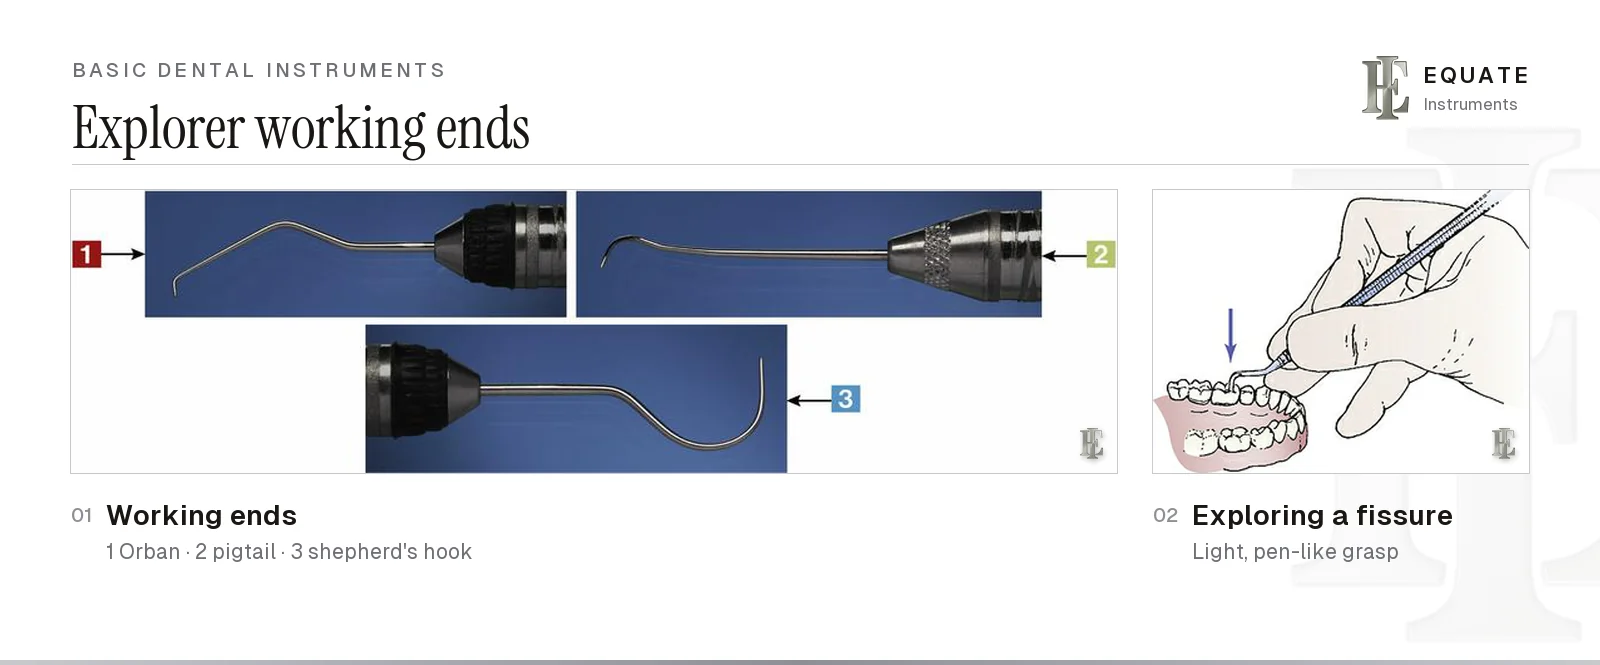
An explorer has a thin, flexible, sharp-pointed tip that transmits vibration to the fingers. Clinicians use it to feel for calculus on root surfaces, check the margins of crowns and fillings for overhangs and gaps, locate furcations and examine pits and fissures.
Tip shape decides where an explorer reaches. A shepherd's hook (No. 23) suits occlusal surfaces and the smooth and proximal surfaces it can reach easily. A pigtail or cowhorn explorer is curved to wrap around proximal surfaces and under contacts. An Orban explorer has a short tip bent at a right angle to the shank, which lets it follow a root surface below the gumline with little tissue stretching. Double-ended explorers may carry the same tip as a mirror pair, two different tips, or an explorer at one end and a periodontal probe at the other.
Practice has changed on caries detection. The International Caries Detection and Assessment System (ICDAS) asks for teeth that have been cleaned and then dried with air: a surface is only scored sound (code 0) if nothing shows after about five seconds of drying. Suspect pits are checked with a ball-ended WHO probe drawn gently along the fissure, and an ICDAS review in the International Journal of Clinical Pediatric Dentistry notes that a sharp explorer adds no accuracy and can damage the enamel over an early lesion. A small exploratory study of 49 primary molar surfaces under an environmental scanning electron microscope (Mattos-Silveira and colleagues, BMC Oral Health 2016) found that ball-ended probes left less severe damage than sharp explorers. Sharp explorers remain the standard for calculus detection and margin checks. Compare tip designs in the dental explorers guide.
Cotton forceps (cotton pliers): transfer and placement
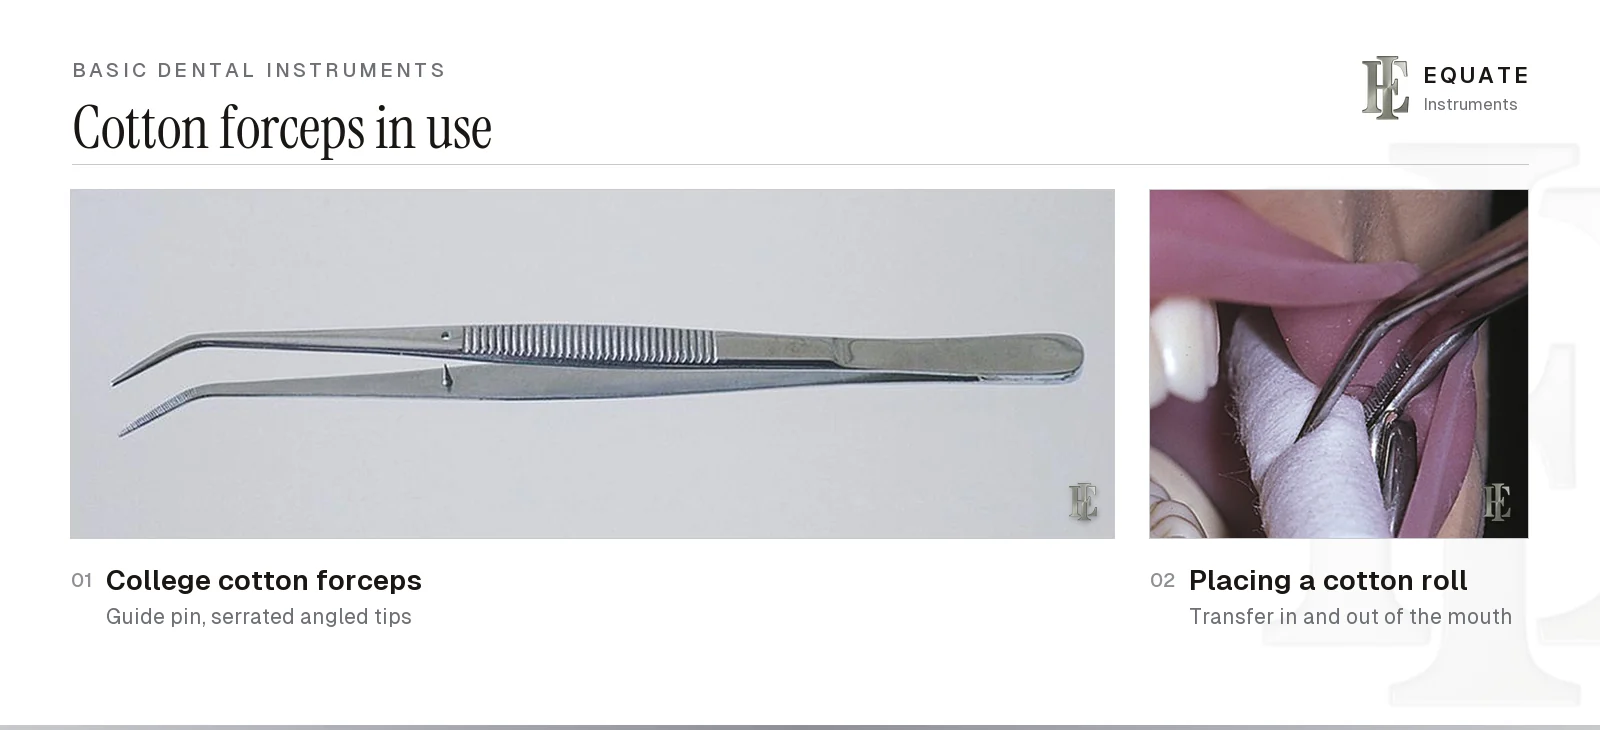
Cotton forceps, also called cotton pliers or college tweezers, grasp and transfer small items into and out of the oral cavity: cotton rolls and pellets, wedges, matrix strips, gingival retraction cord, endodontic paper points and debris. Angled tips let the instrument reach posterior teeth while the hand stays outside the mouth.
Tips are plain or serrated, pointed or rounded, and thin or thick. Serrations stop a damp cotton roll from slipping, while smooth, fine tips are kinder to small items such as paper points. Locking forceps have a small catch that holds the beaks closed, so an item can be passed between clinician and assistant without being dropped; they're common on endodontic and surgical trays. Non-magnetic versions stop tiny metal parts clinging to the tips. London College and Meriam patterns, tips and locking designs are compared in the cotton pliers guide.
Instrument handles: diameter, weight and grip
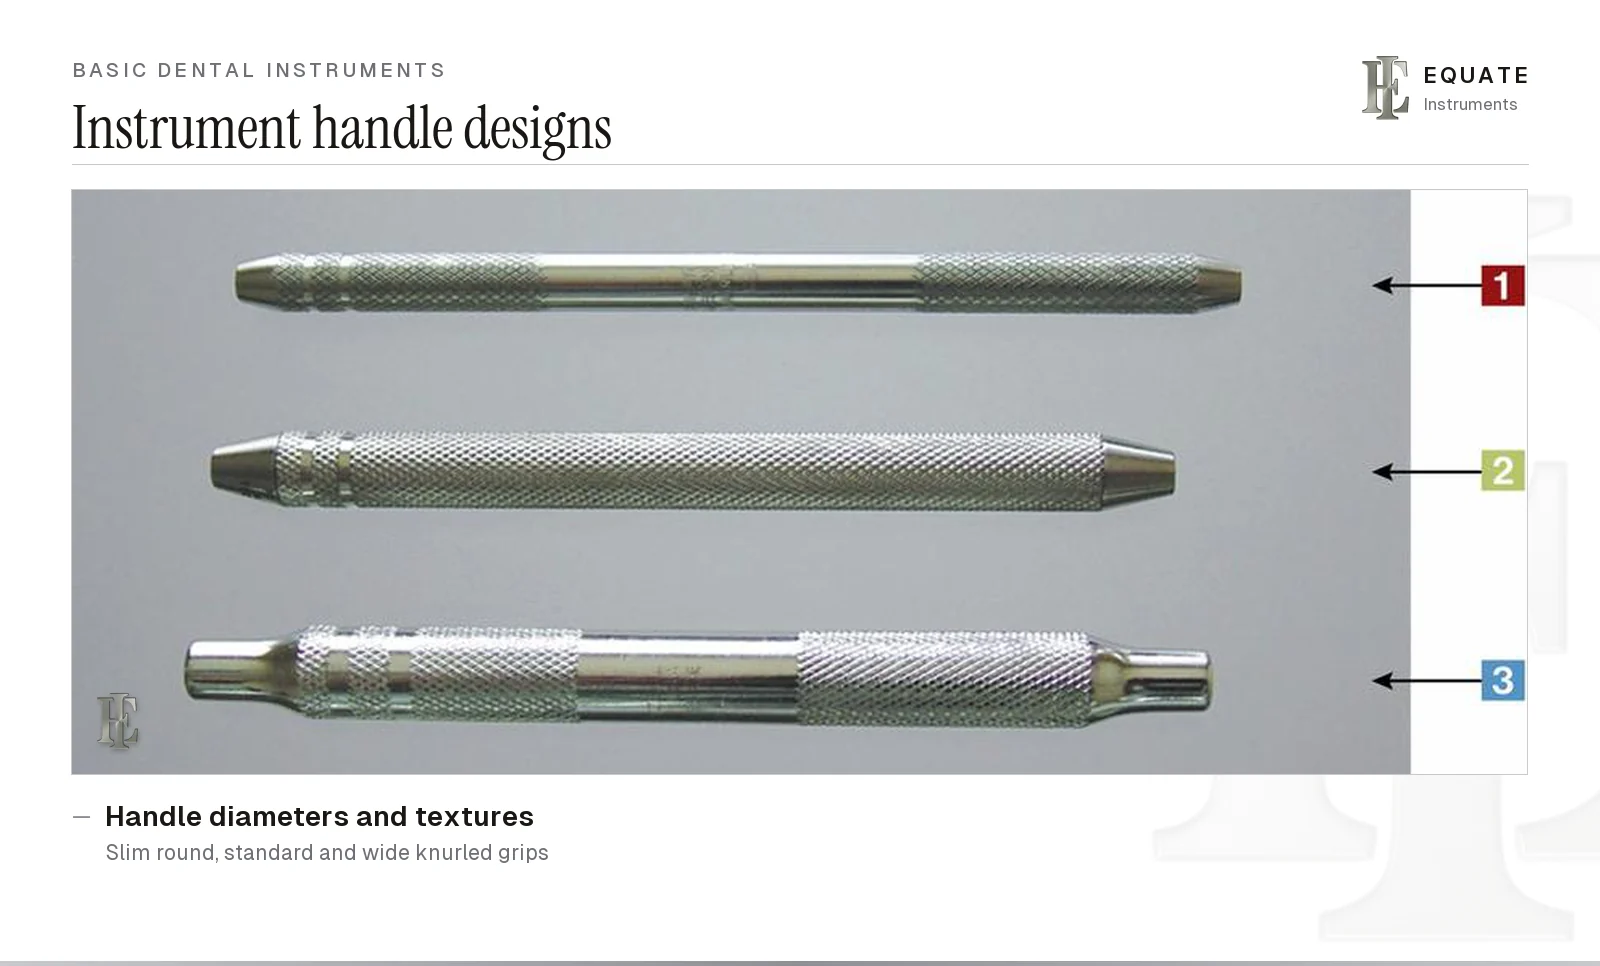
Mirrors, explorers, scalers and many hand instruments share the same basic handle. A handle can be single or double-ended, with working ends that are fixed or removable. Removable working ends screw in and can be replaced when worn, which is how most mirror heads are mounted.
Handle choice is an ergonomic decision. Wider handles spread the grip and need less pinch force to control the tip, lighter handles reduce fatigue over a long clinic, and textured or knurled surfaces stop a gloved hand slipping when the instrument is wet. Handles that alternate in diameter along their length are meant to vary the grip and reduce repetitive strain on the hand and wrist. Typical options are a slim round handle of about ¼ inch (6 mm), a standard hollow handle, and a lightweight slip-resistant pattern of about ⅜ inch (9.5 mm).
The basic tray setup
The basic setup goes on the tray in the order it will be used: mirror, explorer, cotton forceps, reading top to bottom in an instrument cassette or left to right on a flat tray. Colour-coded rings make it quick to check a set is complete after reprocessing, and most examination trays add a periodontal probe as a fourth instrument. Under HTM 01-05, anything set out for a patient counts as contaminated afterwards, used or not.
Other setups build on this core: a composite tray adds restorative instruments and a hygiene tray adds scalers and curettes, while some examinations add a charting probe, articulating paper forceps or radiograph holders. For the step-by-step layout, mirrored for left-handed operators, see the basic dental tray setup.
Cleaning and sterilising basic instruments
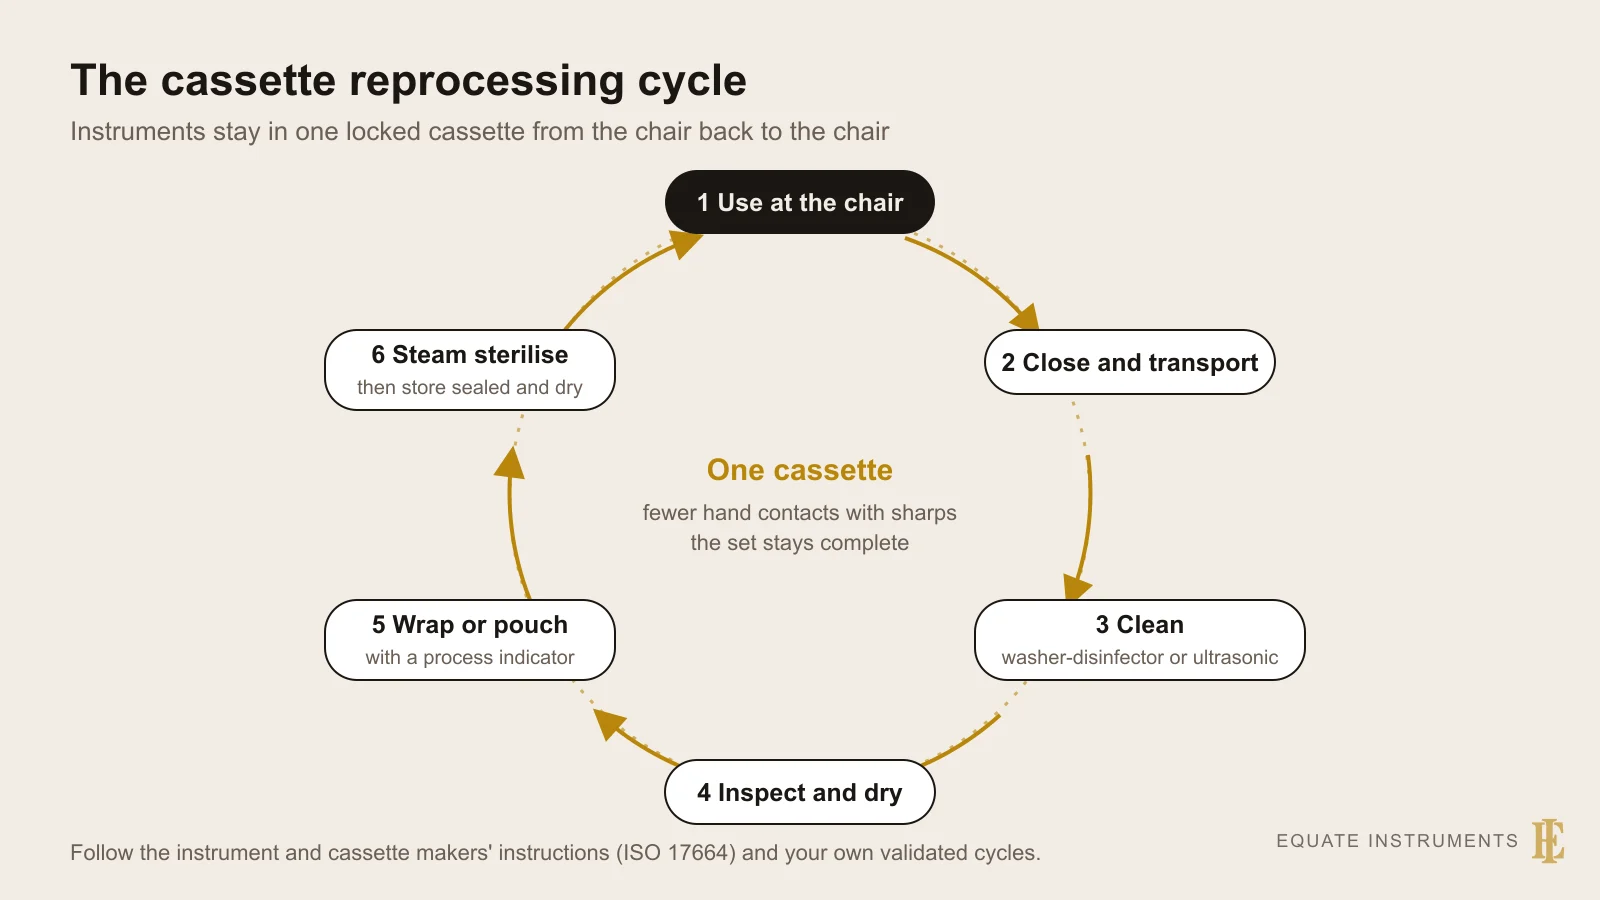
Under the classification Earle Spaulding proposed in 1968, instruments that penetrate soft tissue or touch bone are critical and those that touch mucous membranes are semi-critical. The CDC's current summary gives mouth mirrors as a semicritical example and periodontal scalers and surgical instruments as critical ones. Either way, the US Centers for Disease Control and Prevention guidelines (Kohn and colleagues, 2003) and the Department of Health's HTM 01-05 for dental practices in England expect heat-tolerant mirrors, explorers and cotton forceps to be heat sterilised between patients, and HTM 01-05 asks for a separate sterilised instrument tray for each patient. Follow the reprocessing instructions the manufacturer supplies under ISO 17664 and your national rules; the wider workflow is covered in dental sterilisation and protective equipment.
- Clean first: remove debris by ultrasonic or washer-disinfector cleaning, since sterilisation can't make up for dirty instruments.
- Pack with an internal process indicator: the CDC asks for a chemical indicator inside every package, whether the set is sealed in a pouch or the cassette is wrapped and closed with indicator tape outside.
- Sterilise in a steam steriliser validated for wrapped loads.
- Check the external indicator when the load comes out, then the internal indicator when the pack is opened at the chair. Don't use a pack if either hasn't changed colour.
- Label each pack with the steriliser, the cycle or load number and the date, store it dry and intact until use, and record the cycle as your national rules require.
Buying basic instruments: what to check
- Mirror glass: front-surface or rhodium for sharp vision; plain glass where durability matters more.
- Fitting: cone-socket heads only fit cone-socket handles, and simple-stem (universal thread) heads only fit thread handles.
- Explorer tips: fine and flexible, and sharp enough to catch on calculus, with a tip shape matched to the job.
- Cotton forceps: tips that meet along their full length without crossing, and serrations that grip without tearing cotton.
- Handles: a diameter and weight that suit the clinician's hand, with a texture that grips through wet gloves.
- Material: passivated stainless steel that takes repeated steam sterilisation without pitting or staining; BS EN ISO 7153-1 sets out the metals used for surgical and dental instruments.
The Equate difference
Equate's catalogue has 23 mouth mirror heads, 12 mirror handles, 64 single-ended and double-ended explorers plus 32 explorer–probe combinations, 32 cotton pliers and college or locking tweezers, 19 instrument cassettes and ready-made basic examination kits of 3 and 5 instruments.
Equate Basic Dental Instruments: Mirror, Explorer, Cotton Forceps and Handles options

Front Surface Mouth Mirror (SS) - No. 3
EI-0001
Standard Mouth Mirror (SS) - No. 3 (12 pcs)
EI-0002
Mouth Mirror No. 4 - Rhodium Front Surface, 22 mm, Universal Thread
EI-0003
Mouth Mirror No.4 Plain 22mm Universal (10 pcs)
EI-0004
Mouth Mirror No.4 Plain 22mm Universal (12 pcs)
EI-0005
Mouth Mirror No. 5 - Rhodium Front Surface, 24 mm, Universal Thread
EI-0006
Mouth Mirror No.5 Plain 24mm Universal (10 pcs)
EI-0007
Mouth Mirror No.5 Plain 24mm Universal (12 pcs)
EI-0008
Explorer 3A - Single-Ended Curved Hook
EI-0033
Shepherd's Hook Explorer No.23
EI-0035
Mouth Mirror Handle - Hollow 10 mm
EI-0037
Holst-Style Explorer - Double-Ended Hollow Handle
EI-0041Browse all diagnostic instruments
Buying in your market
Frequently asked questions
What are the three basic dental instruments?
The mouth mirror, the explorer and the cotton forceps (cotton pliers). Together they're called the basic setup and appear on almost every dental tray.
What are diagnostic instruments in dentistry?
They're the hand instruments used to examine the mouth: the mouth mirror for vision, the explorer for touch, the periodontal probe for measuring the gums and the cotton forceps for handling small items.
Which explorer is used for checking for calculus below the gumline?
A subgingival explorer such as the Orban, with a short tip bent at a right angle to the shank, or a fine curved pigtail. The shepherd's hook is better suited to occlusal and accessible smooth surfaces.
Which basic instrument goes in which hand?
The mouth mirror stays in the non-dominant hand for vision and retraction. The explorer or probe works in the dominant hand, which also picks up the cotton forceps when something needs placing or removing.
Do basic dental instruments need to be sterilised after every patient?
Yes. Mirrors, explorers and cotton forceps touch mucous membranes or can penetrate soft tissue, so infection-control guidance from the CDC and HTM 01-05 expects them to be cleaned, packed with a process indicator and heat sterilised between patients.
References
- Boyd LB. Dental Instruments: A Pocket Guide, 7th edition. Saunders/Elsevier, 2020 (photographs used under licence)
- Kohn WG, et al. Guidelines for Infection Control in Dental Health-Care Settings, 2003. MMWR 52(RR-17), Centers for Disease Control and Prevention
- Department of Health (England). Health Technical Memorandum 01-05: Decontamination in primary care dental practices, 2013 edition. NHS England
- Spaulding EH. Chemical disinfection of medical and surgical materials. In: Lawrence CA, Block SS (eds). Disinfection, Sterilization, and Preservation. Lea & Febiger, 1968
- International Caries Detection and Assessment System (ICDAS) Coordinating Committee. ICDAS II criteria
- ISO 9873 Dentistry: intra-oral mirrors
- ISO 17664-1 Processing of health care products: information to be provided by the medical device manufacturer
- Gugnani N, Pandit IK, Srivastava N, Gupta M, Sharma M. International Caries Detection and Assessment System (ICDAS): a new concept. International Journal of Clinical Pediatric Dentistry 2011;4(2):93–100
- Mattos-Silveira J, Oliveira MM, Matos R, Moura-Netto C, Mendes FM, Braga MM. Do the ball-ended probe cause less damage than sharp explorers? An ultrastructural analysis. BMC Oral Health 2016;16:39
- Centers for Disease Control and Prevention. Summary of infection prevention practices in dental settings: sterilization and disinfection of patient-care items
- BS EN ISO 7153-1:2016 Surgical instruments. Materials. Metals. BSI
I am a…
Related
- Dental Mouth Mirrors
- Dental Explorers
- Periodontal Probes
- Restorative Dental Hand Instruments
- Enamel-Cutting Instruments and G.V. Black's Instrument Formula
- Dental Hygiene Instruments: Curettes, Sickle Scalers, Ultrasonic Inserts and Sharpening
- Dental Sterilisation and Protective Equipment
- Basic Dental Tray Setup (Dental Exam Tray)
- Dental Cotton Pliers (Dental Tweezers)
- Dental Instrument Cassettes, Trays and Boxes