Crown and Bridge Tray Setup: Preparation and Cementation
Written by the Equate Instruments Technical Team · Reviewed by the Medical & Dental Board, Equate Instruments · Updated ·
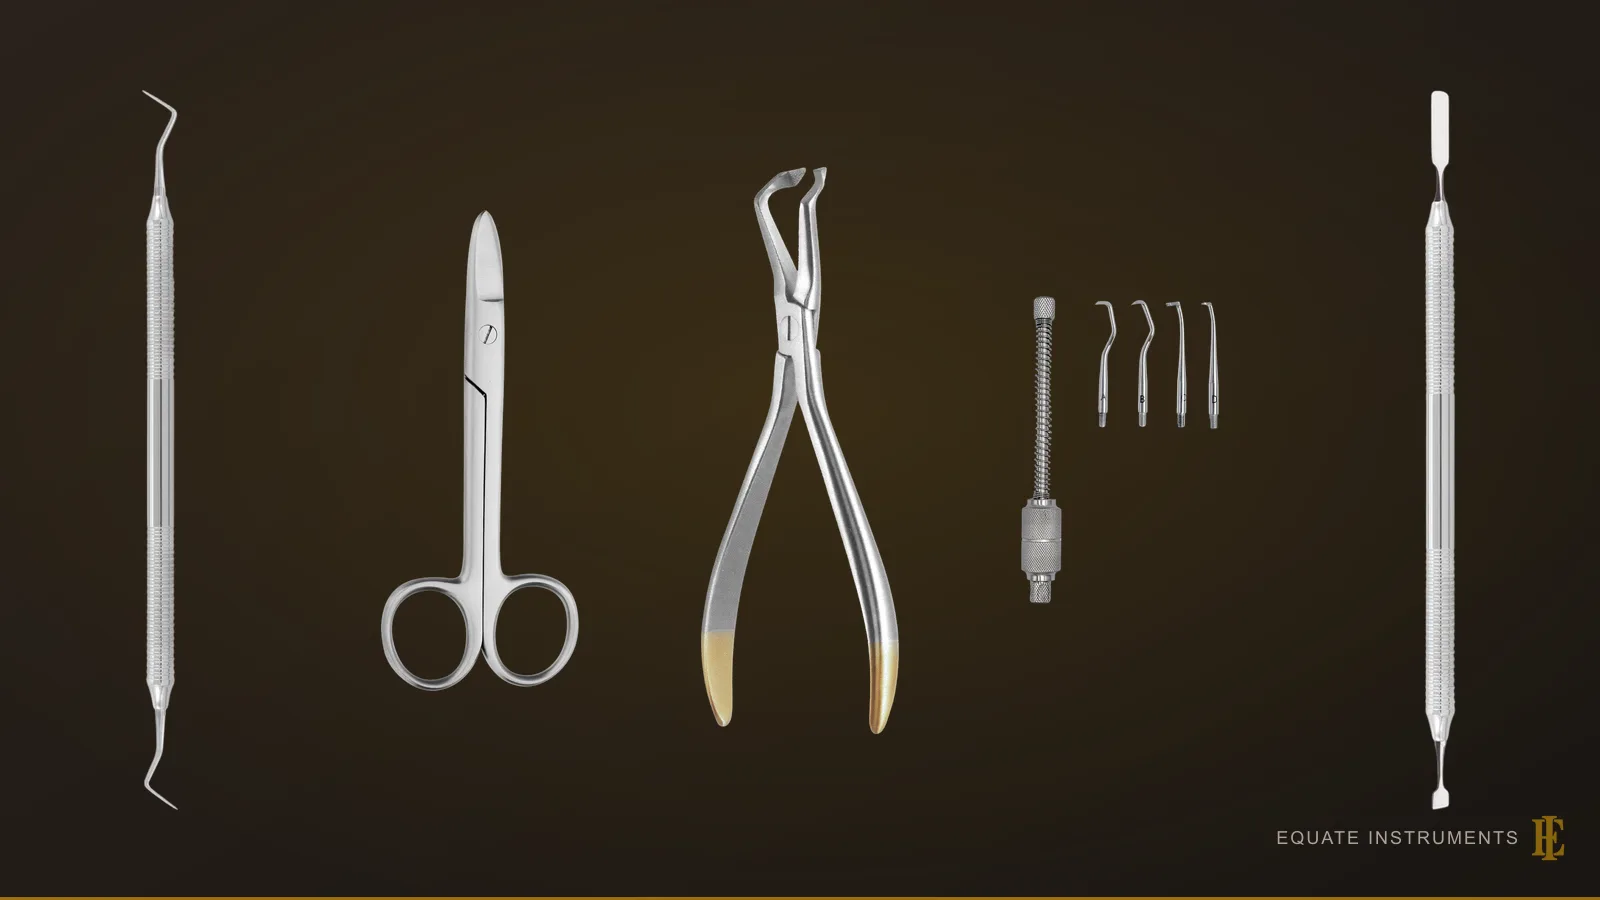
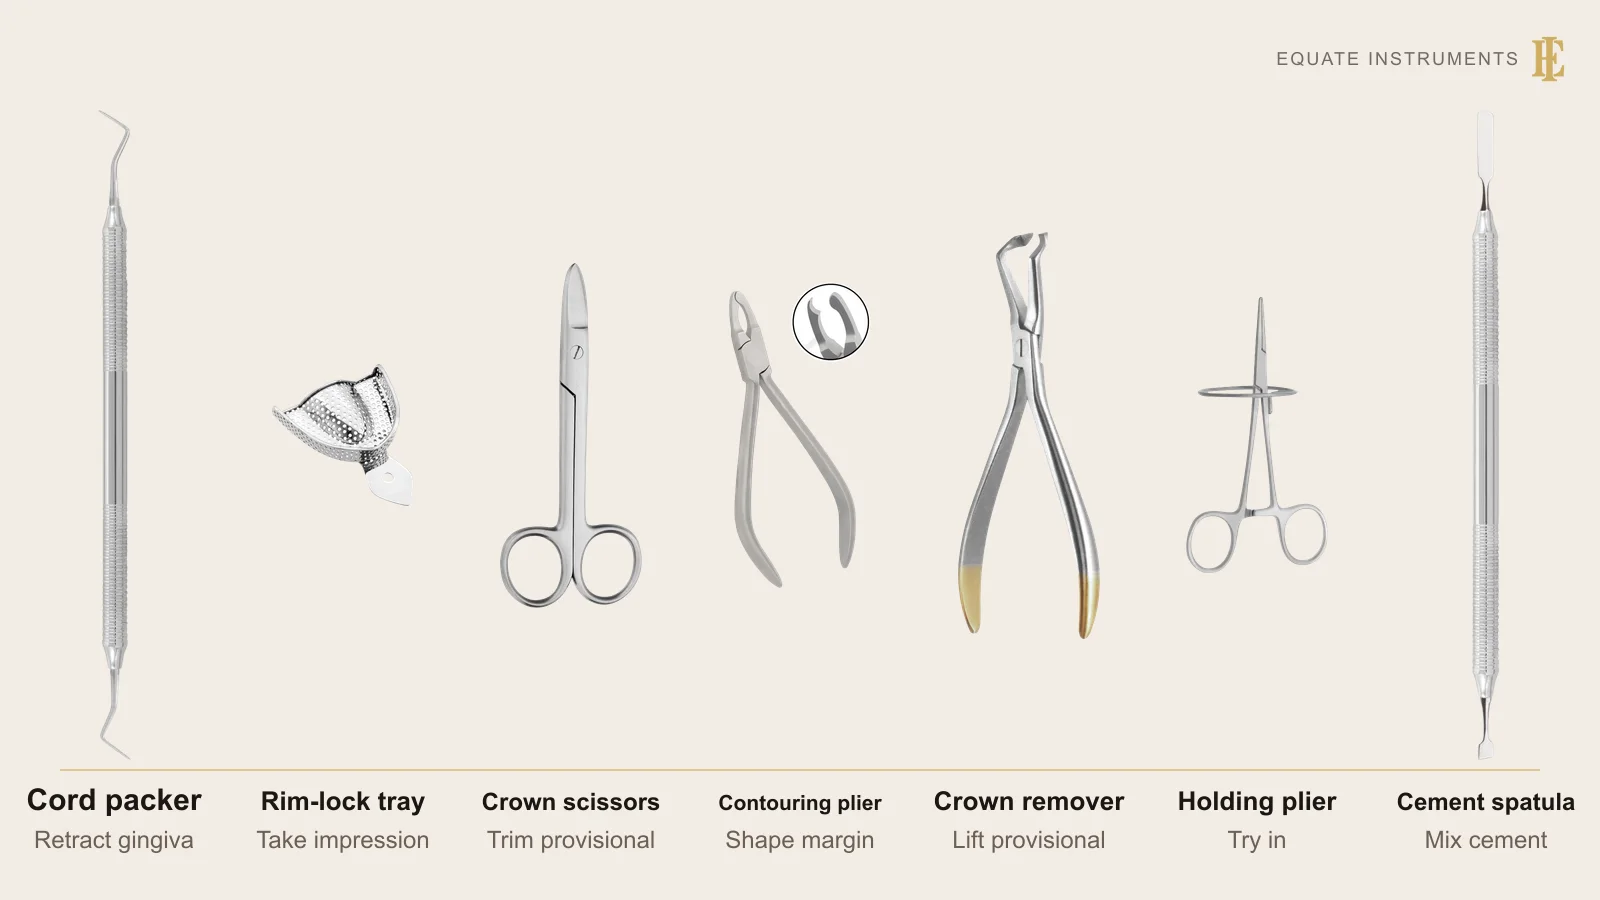
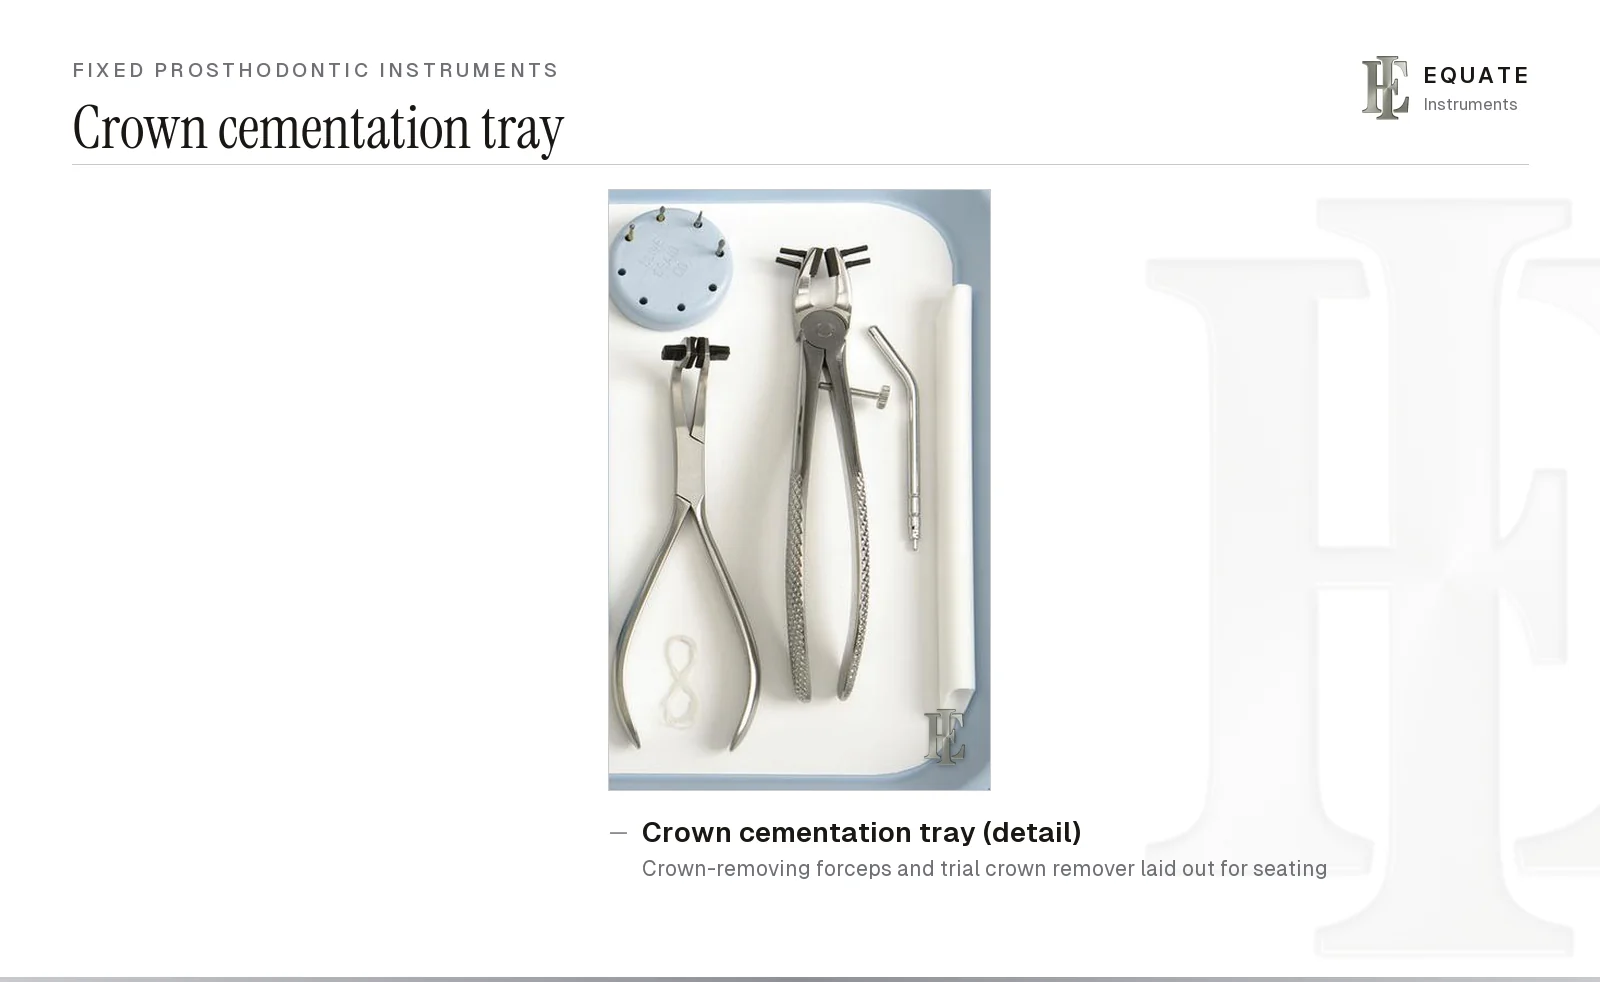
A crown and bridge tray setup comes in two phases. The preparation tray holds the basic exam instruments, a retraction cord packer, a plastic instrument, crown and bridge scissors, a cement spatula, impression trays and provisional crown-removing forceps. The cementation tray keeps the forceps and adds a trial crown remover, cotton rolls and a bite stick, with floss and an explorer or curette to clear cement.
Key points
- Set up two trays: one for preparation, retraction, impression and provisional, and one for removing the provisional and cementing the final crown.
- Pack retraction cord with a smooth or serrated packer whose tip is narrow enough to enter the sulcus but not sharp enough to cut it.
- Remove excess cement completely at the margins, because retained cement irritates the gum.
Step by step
- 1
Anaesthetise and take the shade
Give local anaesthesia and record the shade in consistent, colour-corrected light rather than the operating light alone, before the tooth dries out.
- 2
Prepare the tooth
Reduce the tooth with burs to the planned design, then check the margin and reduction with an explorer and a reduction guide if one was made.
- 3
Pack retraction cord
Loop cord round the tooth and tuck it into the sulcus with a cord packer, starting interproximally, angled towards the tooth rather than the gum.
- 4
Take the impression or scan
Remove the cord or the upper cord, check the margin is dry and visible, and take the impression in a suitable tray or an intraoral scan.
- 5
Make and cement the provisional
Trim the provisional crown with crown and bridge scissors or burs, adapt its margins, mix temporary cement with a spatula and seat it. Clear excess cement and check the bite.
Dental Surgical ScissorsDental Spatulas (Cement, Plaster, Wax and Laboratory)
- 6
Remove the provisional
At the fit appointment, lift the provisional with a crown remover or provisional-removing forceps, and clean the remaining temporary cement from the preparation with a scaler or excavator.
- 7
Try in the crown
Check the crown's fit at the margins with an explorer, the contacts with floss, and the bite with articulating paper. Lift it off with a trial crown remover, and adjust contacts or contour before cementing.
Dental ExplorersCrown and Bridge Scissors, Contouring and Holding Pliers
- 8
Cement the crown
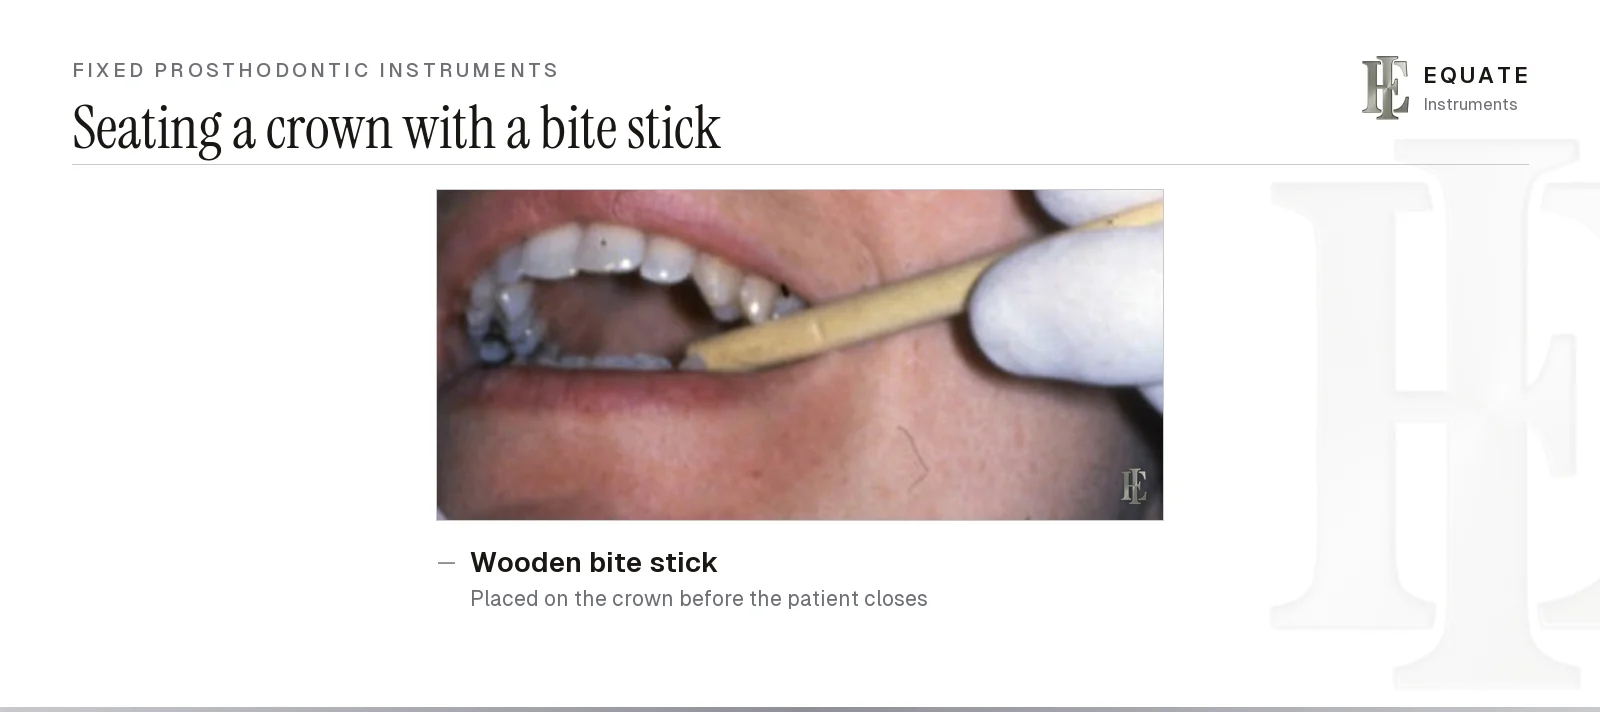
Isolate and dry the tooth, mix the cement on a pad or slab with a spatula, load the crown and seat it with finger pressure or a bite stick.
- 9
Remove excess cement
Remove excess cement at the stage the cement maker recommends, with an explorer or scaler at the margins and floss interproximally, then recheck the bite. Clean cement-retained implant crowns with particular care, because cement left below the margin is strongly linked to peri-implant disease.
Tray checklist
A crown and bridge tray holds the basic exam instruments plus the instruments for retraction, provisionalisation, removal and cementation. The phase column shows which tray each one belongs to. For what each instrument does, see the fixed prosthodontic instruments guide.
| Instrument | What it is for | Guide |
|---|---|---|
| Mirror, explorer, cotton pliers | Both phases: examination, margins, handling | Dental explorers |
| Spoon excavator and curette or scaler | Both phases: removing temporary cement and debris | Spoon excavators |
| Gingival retraction cord packer | Preparation: placing cord in the sulcus | Cord packers |
| Woodson or flat plastic instrument | Both phases: handling cement and provisional material | Composite instruments |
| Crown and bridge scissors | Preparation: trimming cord and provisional crowns | Crown and bridge scissors |
| Contouring pliers | Preparation: adapting a preformed or provisional crown margin | Crown and bridge instruments |
| Provisional crown-removing forceps or crown remover | Both phases: lifting the provisional; a crown remover for a failed crown | Crown removers |
| Trial crown remover | Cementation: lifting the final crown after an uncemented try-in | Crown removers |
| Articulating paper and holder | Both phases: checking the bite | Cotton pliers |
| Cement spatula | Both phases: mixing temporary and final cement | Dental spatulas |
| Impression trays | Preparation: final and opposing impressions | Impression trays |
| Bite stick (wooden, single-use) and cotton rolls | Cementation: isolating and seating the crown | Fixed prosthodontic instruments |
How does the preparation tray differ from the cementation tray?
The preparation tray is about creating the tooth form and recording it; the cementation tray is about removing the provisional and fixing the final restoration.
| Item | Preparation appointment | Cementation appointment |
|---|---|---|
| Local anaesthetic | Almost always | Not on the standard tray; added for sensitive vital teeth |
| Burs | Full preparation set | Finishing and adjustment burs |
| Retraction cord and packer | Yes | Occasionally, to keep the margin dry |
| Impression trays or scanner | Yes | No |
| Provisional material, scissors, temporary cement | Yes | No |
| Provisional crown-removing forceps | Yes, on the standard tray; a crown remover only if an old crown is coming off | Yes, to lift off the provisional |
| Trial crown remover | No | Yes, after the uncemented try-in |
| Cotton rolls | As needed | Yes, for isolation during cementation |
| Final cement, bite stick, articulating paper | Articulating paper only | Yes |
How is gingival retraction cord packed?
Retraction cord is packed into the sulcus to push the gum away from the margin and control fluid, so the impression or scan records the finish line. With a single cord, a cord soaked in astringent is tucked in round the tooth, starting interproximally, left for several minutes and removed just before the impression. With the double-cord technique, a thin cord stays in the sulcus while a thicker one is placed over it and removed.
A 2025 review of soft-tissue management in prosthodontics by Chauhan and colleagues advises a packer tip narrow enough to wind the cord into the sulcus but not so sharp that it cuts the tissue, with smooth tips for twisted cord and serrated tips for braided cord. It also warns that heavy force or a cord left too long can damage the epithelial attachment, and that overlapping ends are best left interproximally, where the tissue supports them.
How do you remove a provisional or a cemented crown?
A provisional crown is usually lifted with a crown remover plier that has rubber or resin-gripping jaws, or with a hooked remover drawn along the long axis of the tooth. Temporary cement gives way under modest force, so the main risk is breaking the provisional, which matters little.
A permanently cemented crown is a different job. Slide-hammer and spring-loaded removers deliver short impacts along the path of withdrawal, and crown spreaders open a slot cut through the crown. Each risks fracturing porcelain, a post or the core, so many clinicians cut off a failed crown rather than try to save it. Warn the patient and protect the airway with gauze or a dam before any removal.
What else is needed besides the instruments?
A crown and bridge appointment also needs the local anaesthetic tray, a shade guide, burs, retraction cord and haemostatic solution (hemostatic), impression material or an intraoral scanner, provisional crown material, temporary and final cement with a mixing pad, articulating paper, floss, cotton rolls, gauze, a bite stick and high-volume suction.
How are crown and bridge instruments reprocessed?
Clear cement from spatulas, packers and plastic instruments at the chair before it sets, because set cement shields the surface underneath from cleaning. Under the CDC's 2003 guidelines the hand instruments are semicritical and are heat sterilised after cleaning; scissors, crown remover pliers and contouring pliers are opened at the joint for cleaning, and stiff joints are lubricated with a non-oil-based lubricant as HTM 01-05 describes.
Slide-hammer removers are dismantled as the manufacturer's instructions (ISO 17664) describe, and their tips cleaned separately. Rubber pads on crown remover pliers wear and are replaced. Impression trays are cleaned and sterilised as reusable metal trays or discarded if they're single-use.
What are the common mistakes on a crown and bridge tray?
- Packing cord with a sharp instrument that tears the sulcus.
- Leaving cement below the margin, where it causes inflammation; Wilson found excess cement at 34 of 42 implants with peri-implant disease and at none of the healthy controls.
- Forcing a cemented crown off without protecting the airway.
- Mixing final cement before the crown has been tried in and adjusted.
Build this tray with Equate
Equate supplies the instruments for both crown and bridge trays. Cord packers in the restorative range come serrated or smooth, with round, square and universal tips. Crown removers in the prosthodontic and laboratory range include pliers with rubber-retentive jaws, slide-hammer and spring-loaded kits with interchangeable tips, crown spreaders and replacement pads, alongside cement spatulas from 2.2 to 9 mm, Beebee crown scissors in straight and curved, saw-edge and tungsten carbide versions, contouring pliers, and perforated and solid impression trays.
The instruments are designed in Finland and made from passivated stainless steel, ultrasonically cleaned, shape-, boil- and performance-tested and individually packed. Clinics can request samples and a quote for a full set.
The Equate difference
For this tray Equate lists 192 references: 13 cord packers (serrated and smooth, round and square), 9 crown and bridge scissors, 28 crown removers and remover kits plus 4 tip and pad packs, 19 cement spatulas, 3 crown-holding and contouring pliers and 116 impression trays and tray sets.
Equate Crown and Bridge Tray Setup: Preparation and Cementation options

Cement Spatula 6 mm
EI-0078
Cement Spatula 6mm - Double-Ended Knurled Handle
EI-0079
Cement Spatula - Double-Ended Titanium-Coated Blades
EI-0080
Retraction Cord Packer UP1 - Knurled Handle
EI-0099
Cement Spatula 5.0mm Hollow Handle 10mm
EI-0126
Cement Spatula 6.0mm - Double-Ended
EI-0127
Cement Spatula 7mm - Solid Handle 6mm
EI-0128
Gingival Cord Packer Universal - 6 mm Solid Handle
EI-0168
Cement Spatula 5 mm - 6 mm Solid Handle
EI-0194
Cord Packer 2.0 mm
EI-0920
Cement Spatula
EI-0930
Cord Packer 2.6mm
EI-0941Browse all prosthodontic & laboratory instruments Browse all restorative & operative instruments Browse all oral surgery instruments Browse all orthodontic instruments
Buying in your market
Frequently asked questions
What instruments are needed for a crown preparation?
The basic exam instruments, a spoon excavator, a retraction cord packer, a plastic instrument, crown and bridge scissors, a cement spatula, impression trays and a provisional crown remover, with burs and impression material.
Which crown instruments go on the cementation tray but not the preparation tray?
The trial crown remover and the bite stick, with cotton rolls standard for isolation while cementing. The retraction cord instrument, crown and bridge scissors and anaesthetic syringe stay off the standard cementation tray, while the basic set, Woodson, spatula, articulating paper, floss and provisional crown-removing forceps appear on both.
What are crown and bridge scissors?
Short, strong scissors, often curved with a serrated or saw edge, used to trim provisional crowns, retraction cord and matrix bands.
How is excess crown cement removed?
With an explorer or scaler at the margins and floss between the teeth, at the setting stage the cement maker recommends.
Does the cementation visit need local anaesthetic?
Not always. The standard cementation tray carries no anaesthetic syringe, but one is added when a vital tooth is too sensitive for the provisional to be removed and the crown cleaned and seated comfortably.
References
- Chauhan R, Chauhan S, Padiyar N, Kaurani P, Gupta A, Khan FN. Present status and future directions: soft tissue management in prosthodontics. World Journal of Methodology 2025;15(4):104497
- Rosenstiel SF, Land MF, Walter R (eds). Contemporary Fixed Prosthodontics, 6th edition. Elsevier, 2022
- Kohn WG, Collins AS, Cleveland JL, Harte JA, Eklund KJ, Malvitz DM. Guidelines for Infection Control in Dental Health-Care Settings, 2003. MMWR 2003;52(RR-17). Centers for Disease Control and Prevention
- Department of Health (England). Health Technical Memorandum 01-05: Decontamination in primary care dental practices, 2013 edition
- Boyd LB. Dental Instruments: A Pocket Guide, 7th edition. Saunders/Elsevier, 2020. Chapter 10, Fixed Prosthodontics Restorative Instruments (photographs used under licence)
- Bird DL, Robinson DS. Modern Dental Assisting. Elsevier (fixed prosthodontics)
- Wilson TG Jr. The positive relationship between excess cement and peri-implant disease: a prospective clinical endoscopic study. Journal of Periodontology 2009;80(9):1388–1392
- Wee AG, Meyer A, Wu W, Wichman CS. Lighting conditions used during visual shade matching in private dental offices. Journal of Prosthetic Dentistry 2016;115(4):469–474
- Sharma A, Rahul GR, Poduval ST, Shetty K. Removal of failed crown and bridge. Journal of Clinical and Experimental Dentistry 2012;4(3):e167–e172
I am a…
Related
- Gingival Cord Packers (Retraction Cord Instruments)
- Dental Crown Removers
- Crown and Bridge Scissors, Contouring and Holding Pliers
- Dental Spatulas (Cement, Plaster, Wax and Laboratory)
- Dental Impression Trays
- Local Anaesthetic (Anesthetic) Tray Setup and How to Load a Dental Syringe
- Fixed Prosthodontic Instruments for Crown and Bridge Work